This setup requires the Slidely SSO configuration details, including the ACS URL and Entity ID. If these haven’t been shared with you, please contact your account POC.
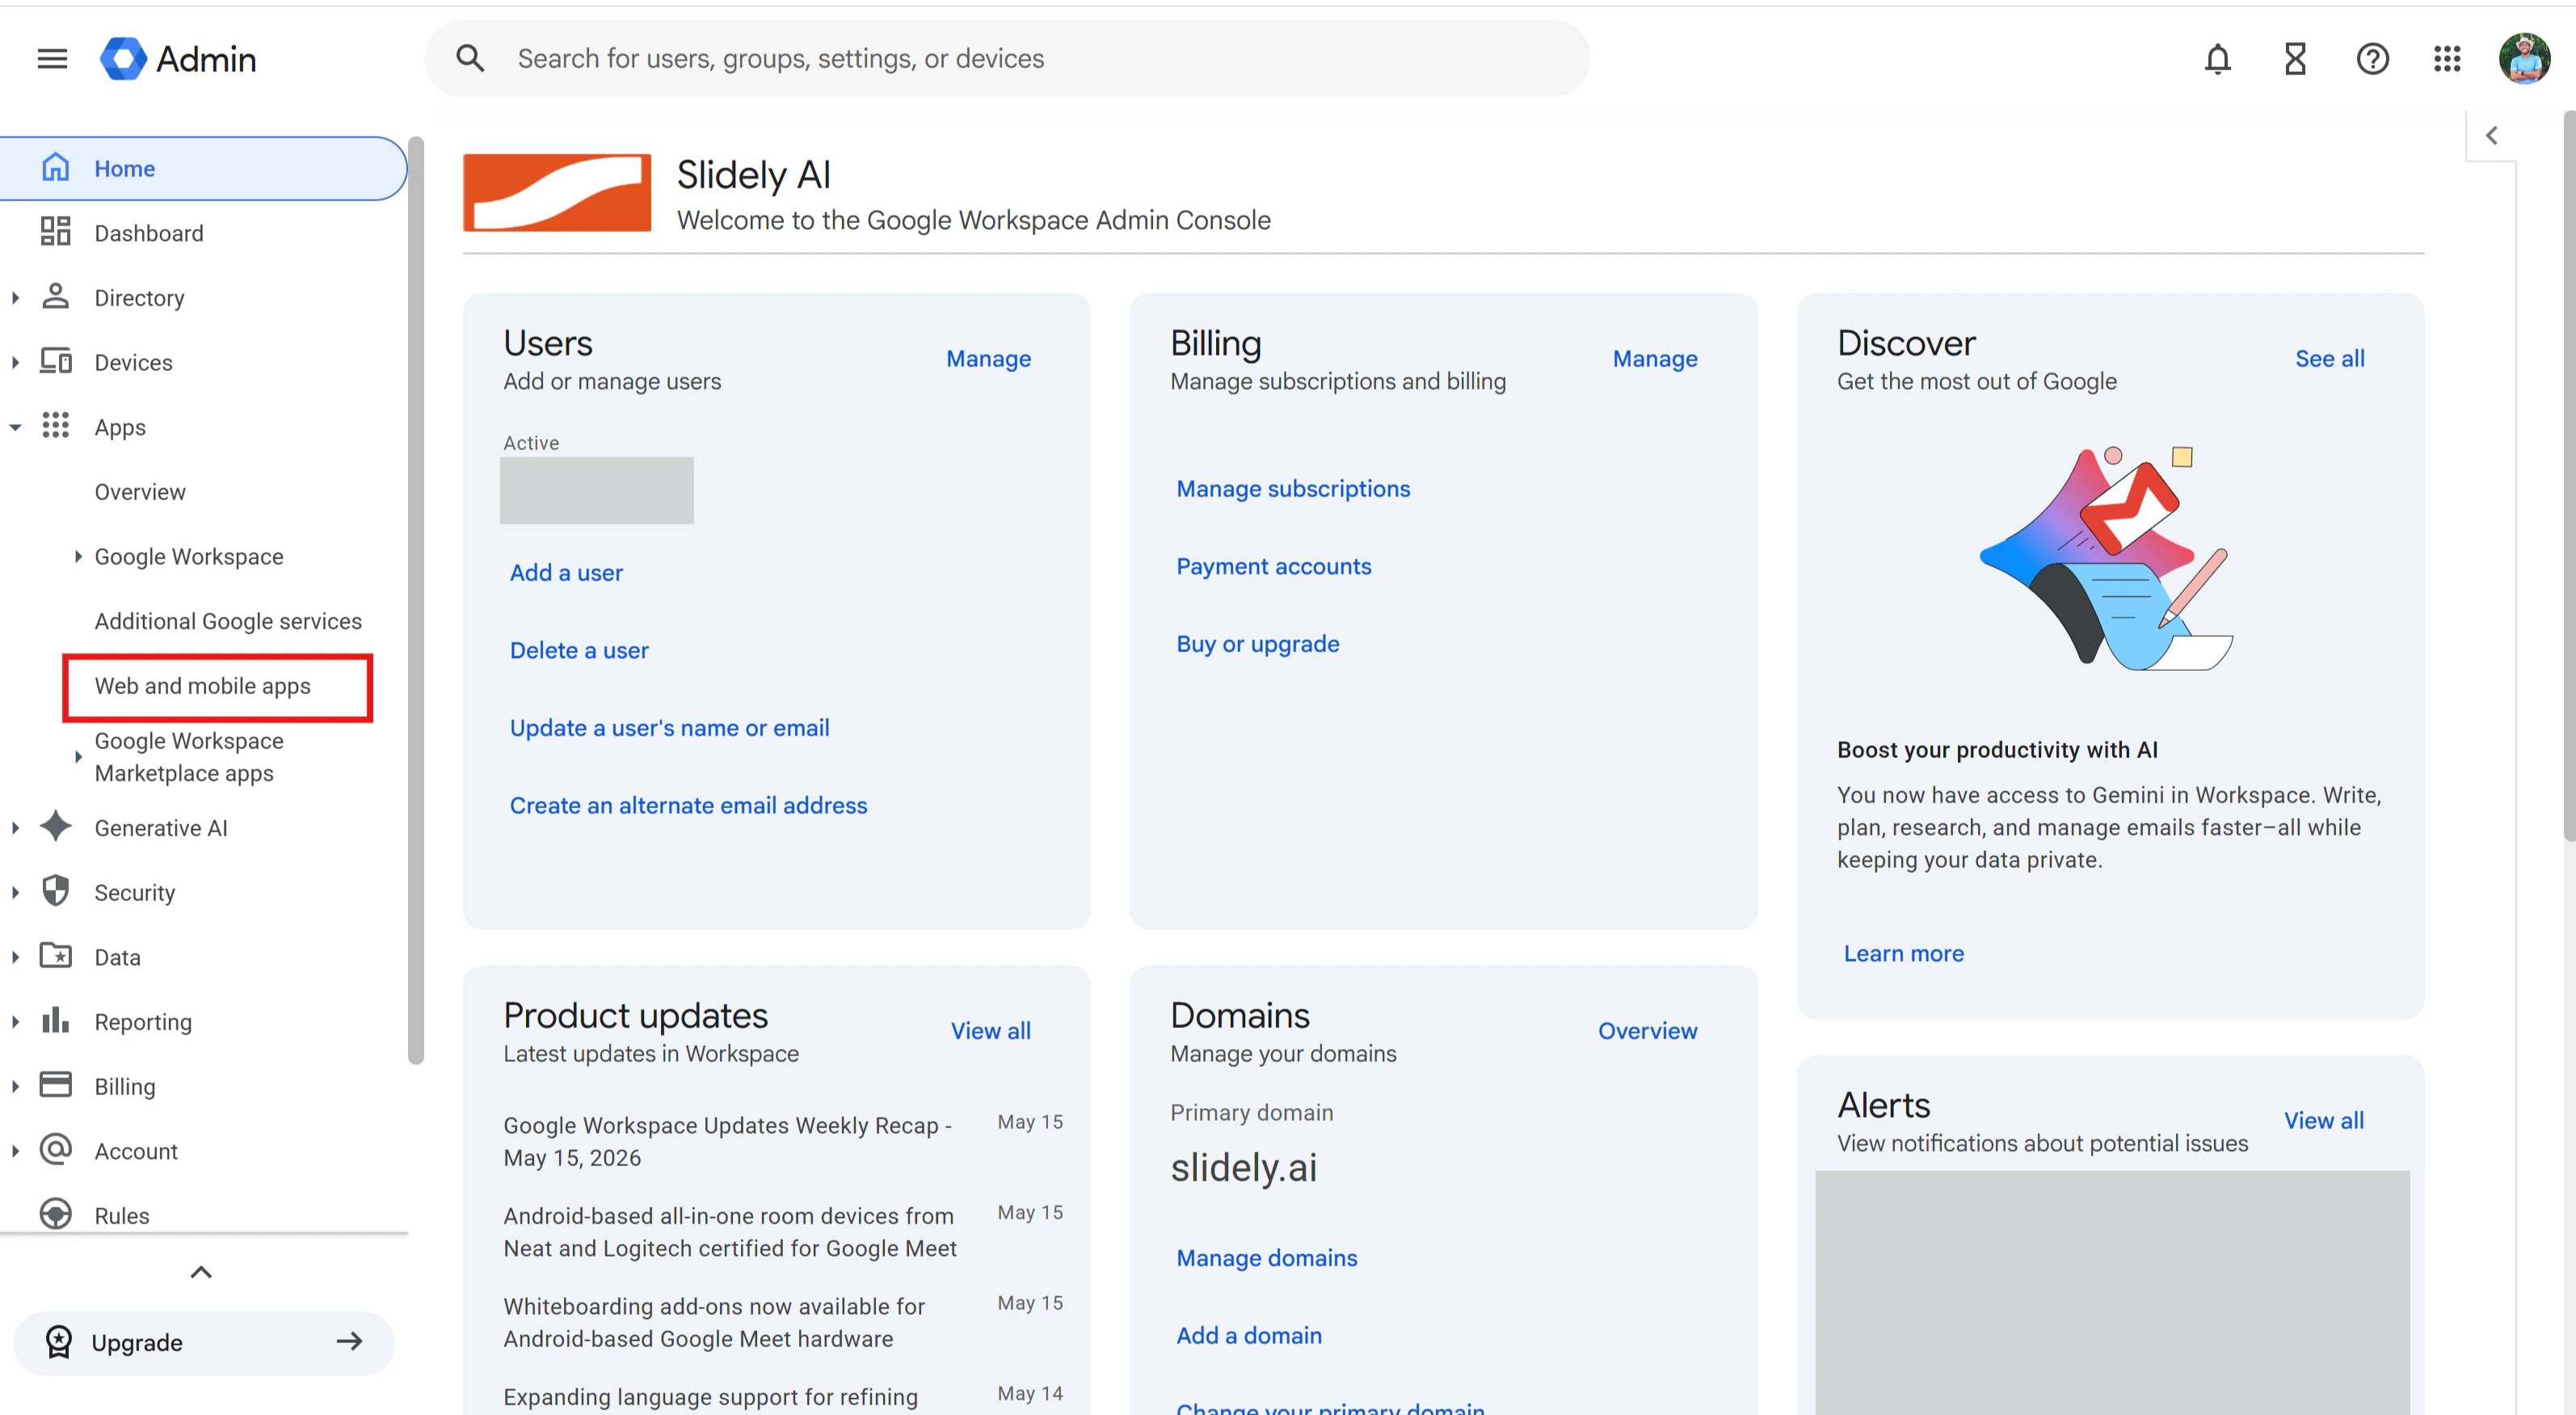
- Open the Google Admin Console and sign in with an administrator account. In the left sidebar, go to Apps > Web and mobile apps.
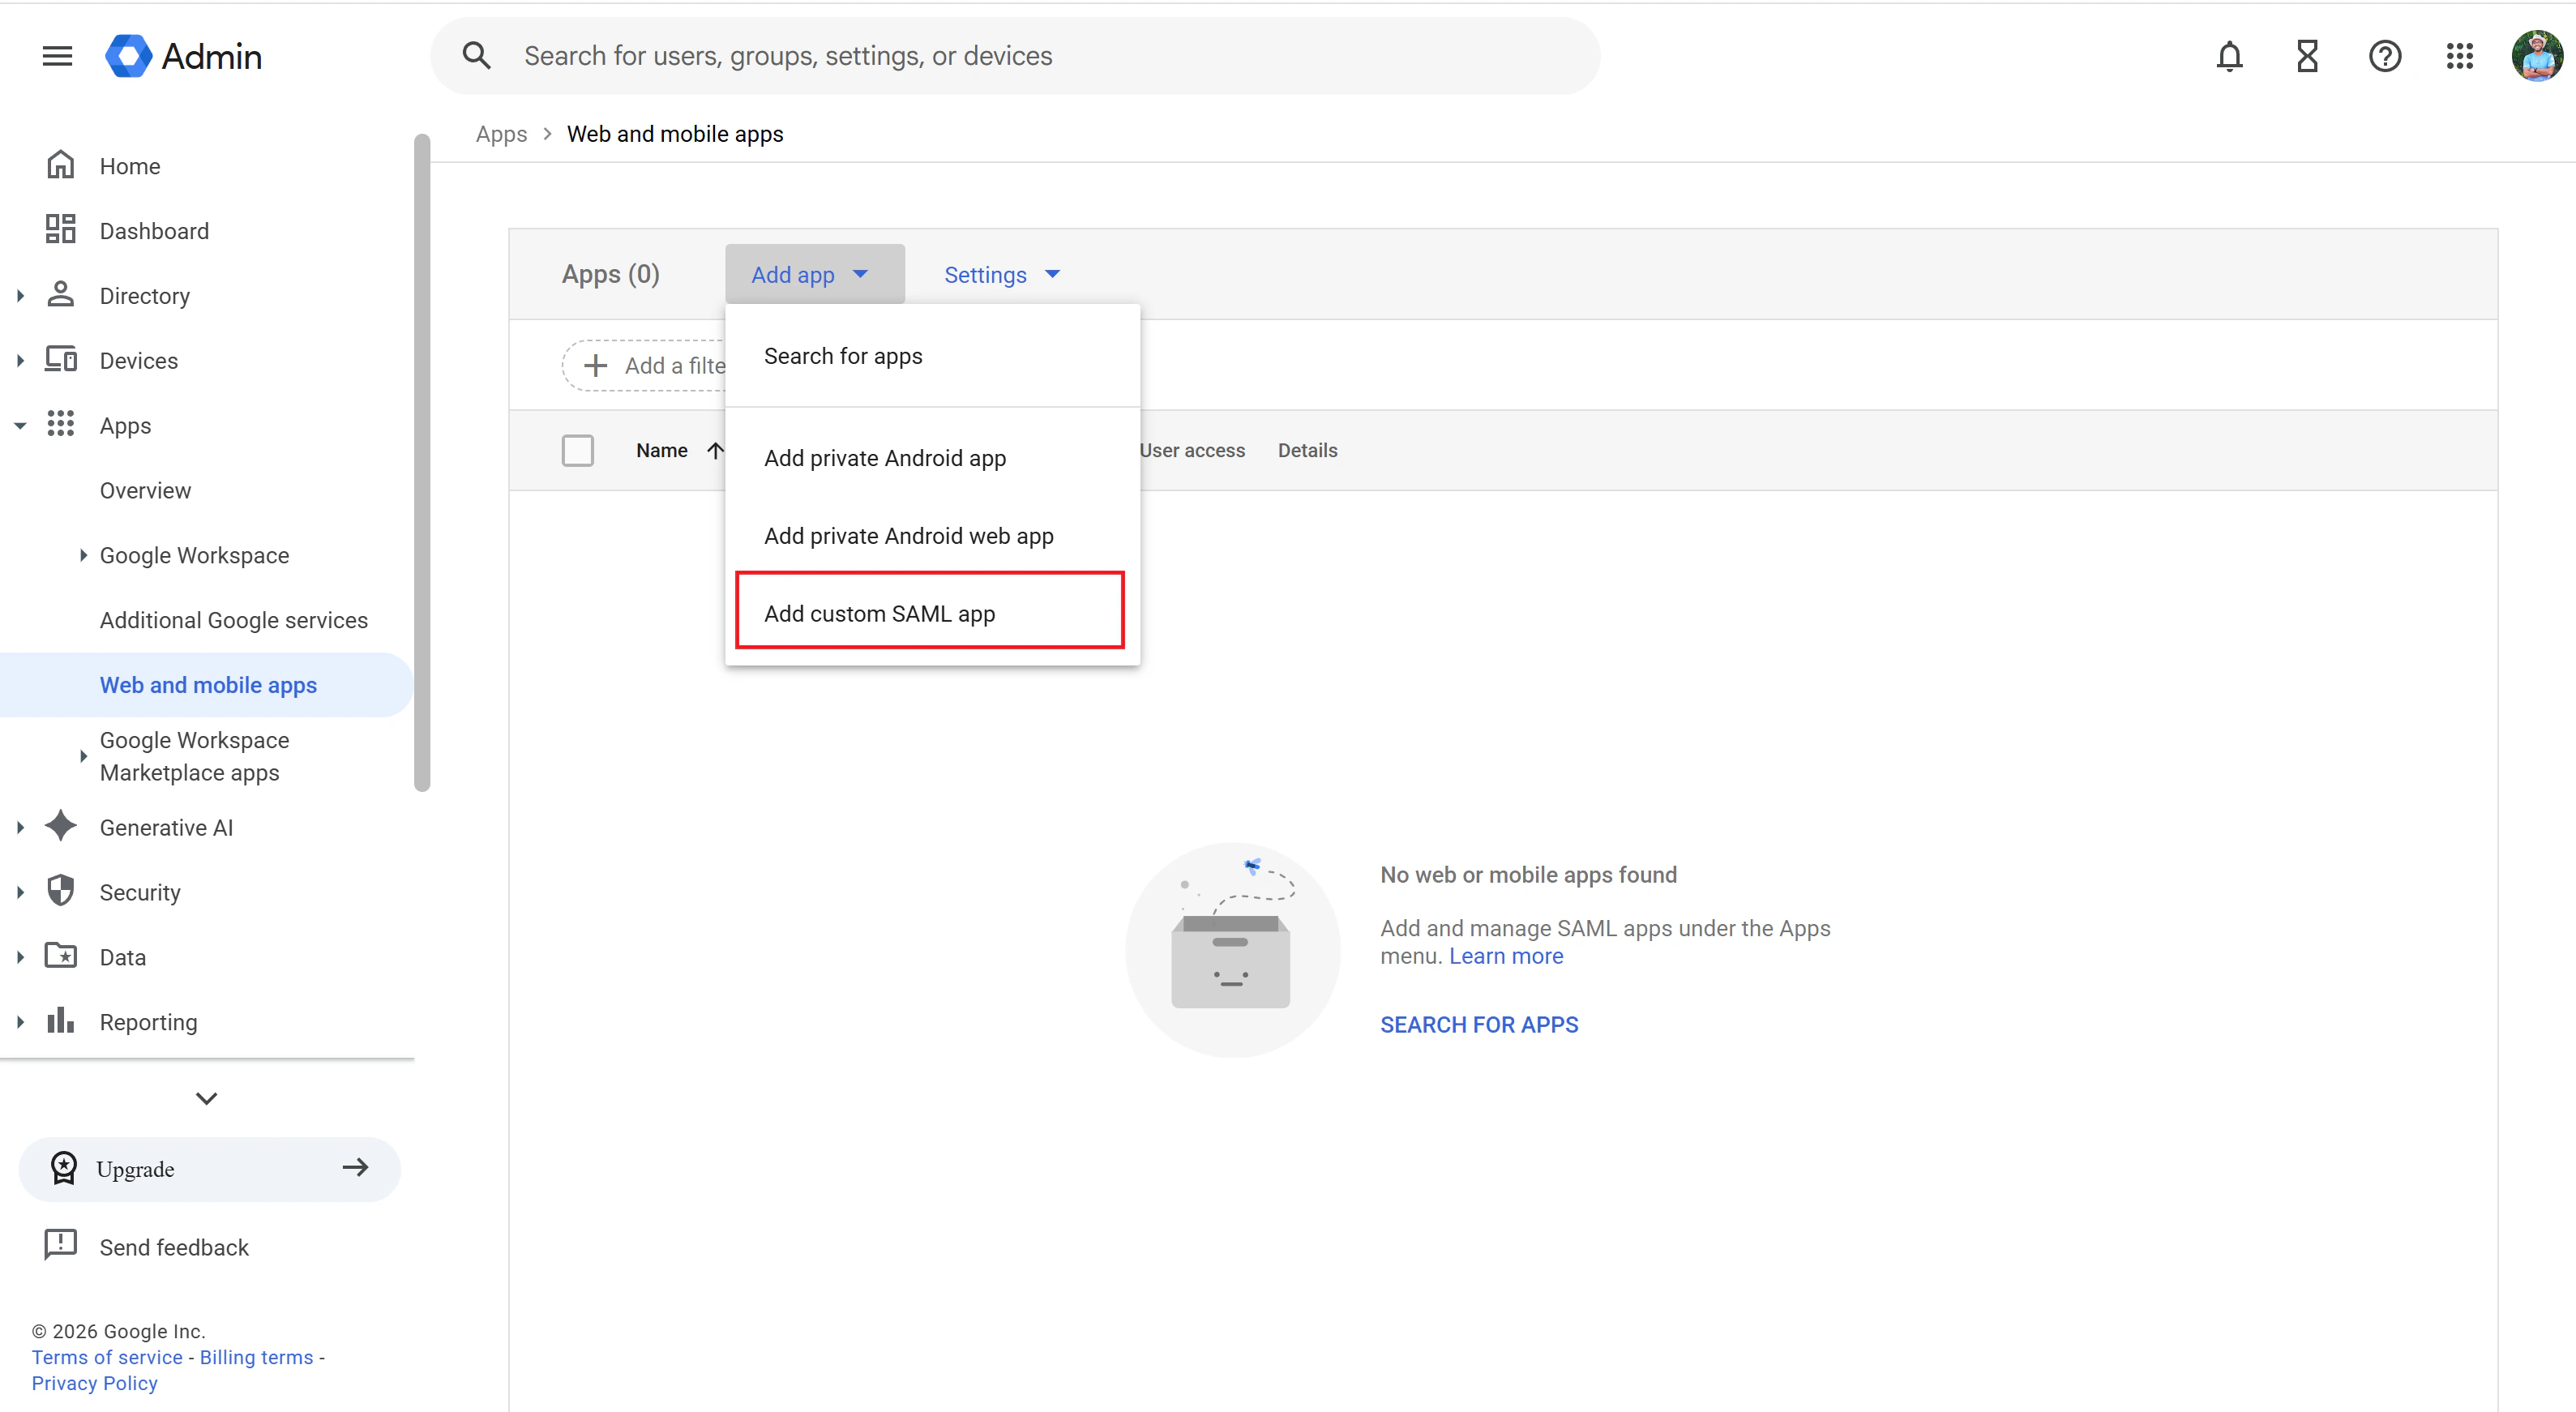
- Click Add app and select Add custom SAML app.
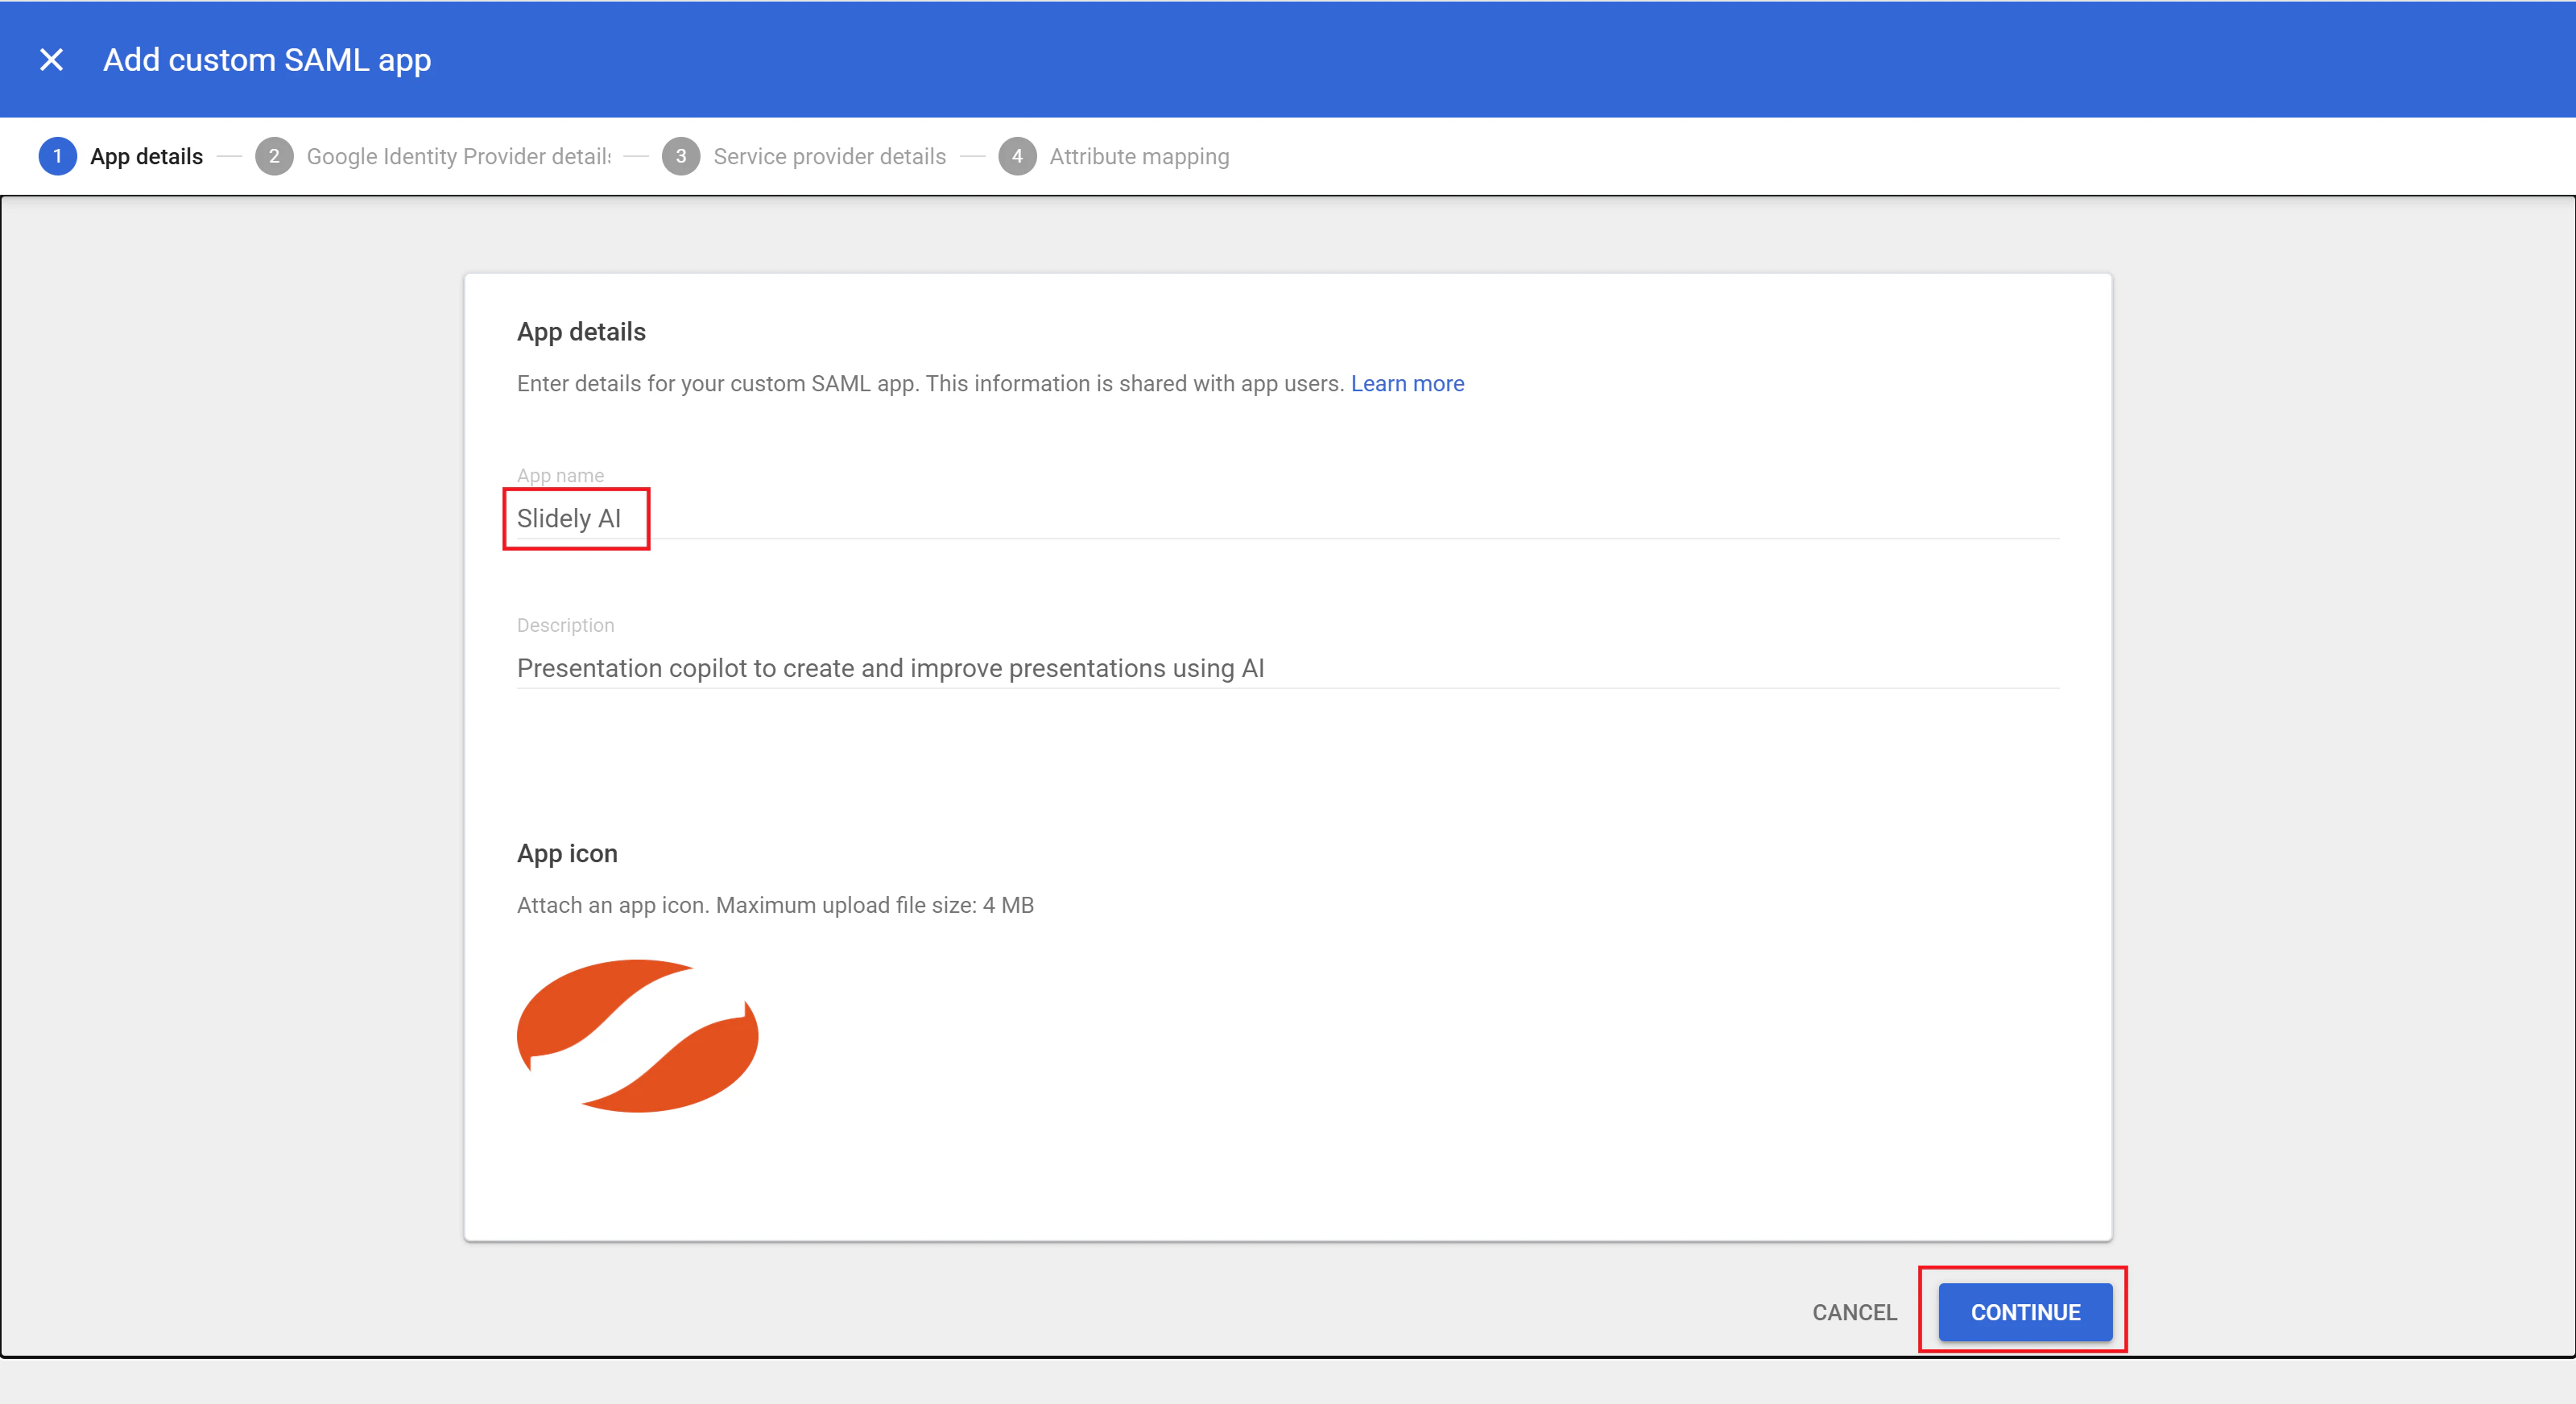
- Enter Slidely AI as the app name. Optionally, add a description and upload the Slidely AI app icon. Click Continue.
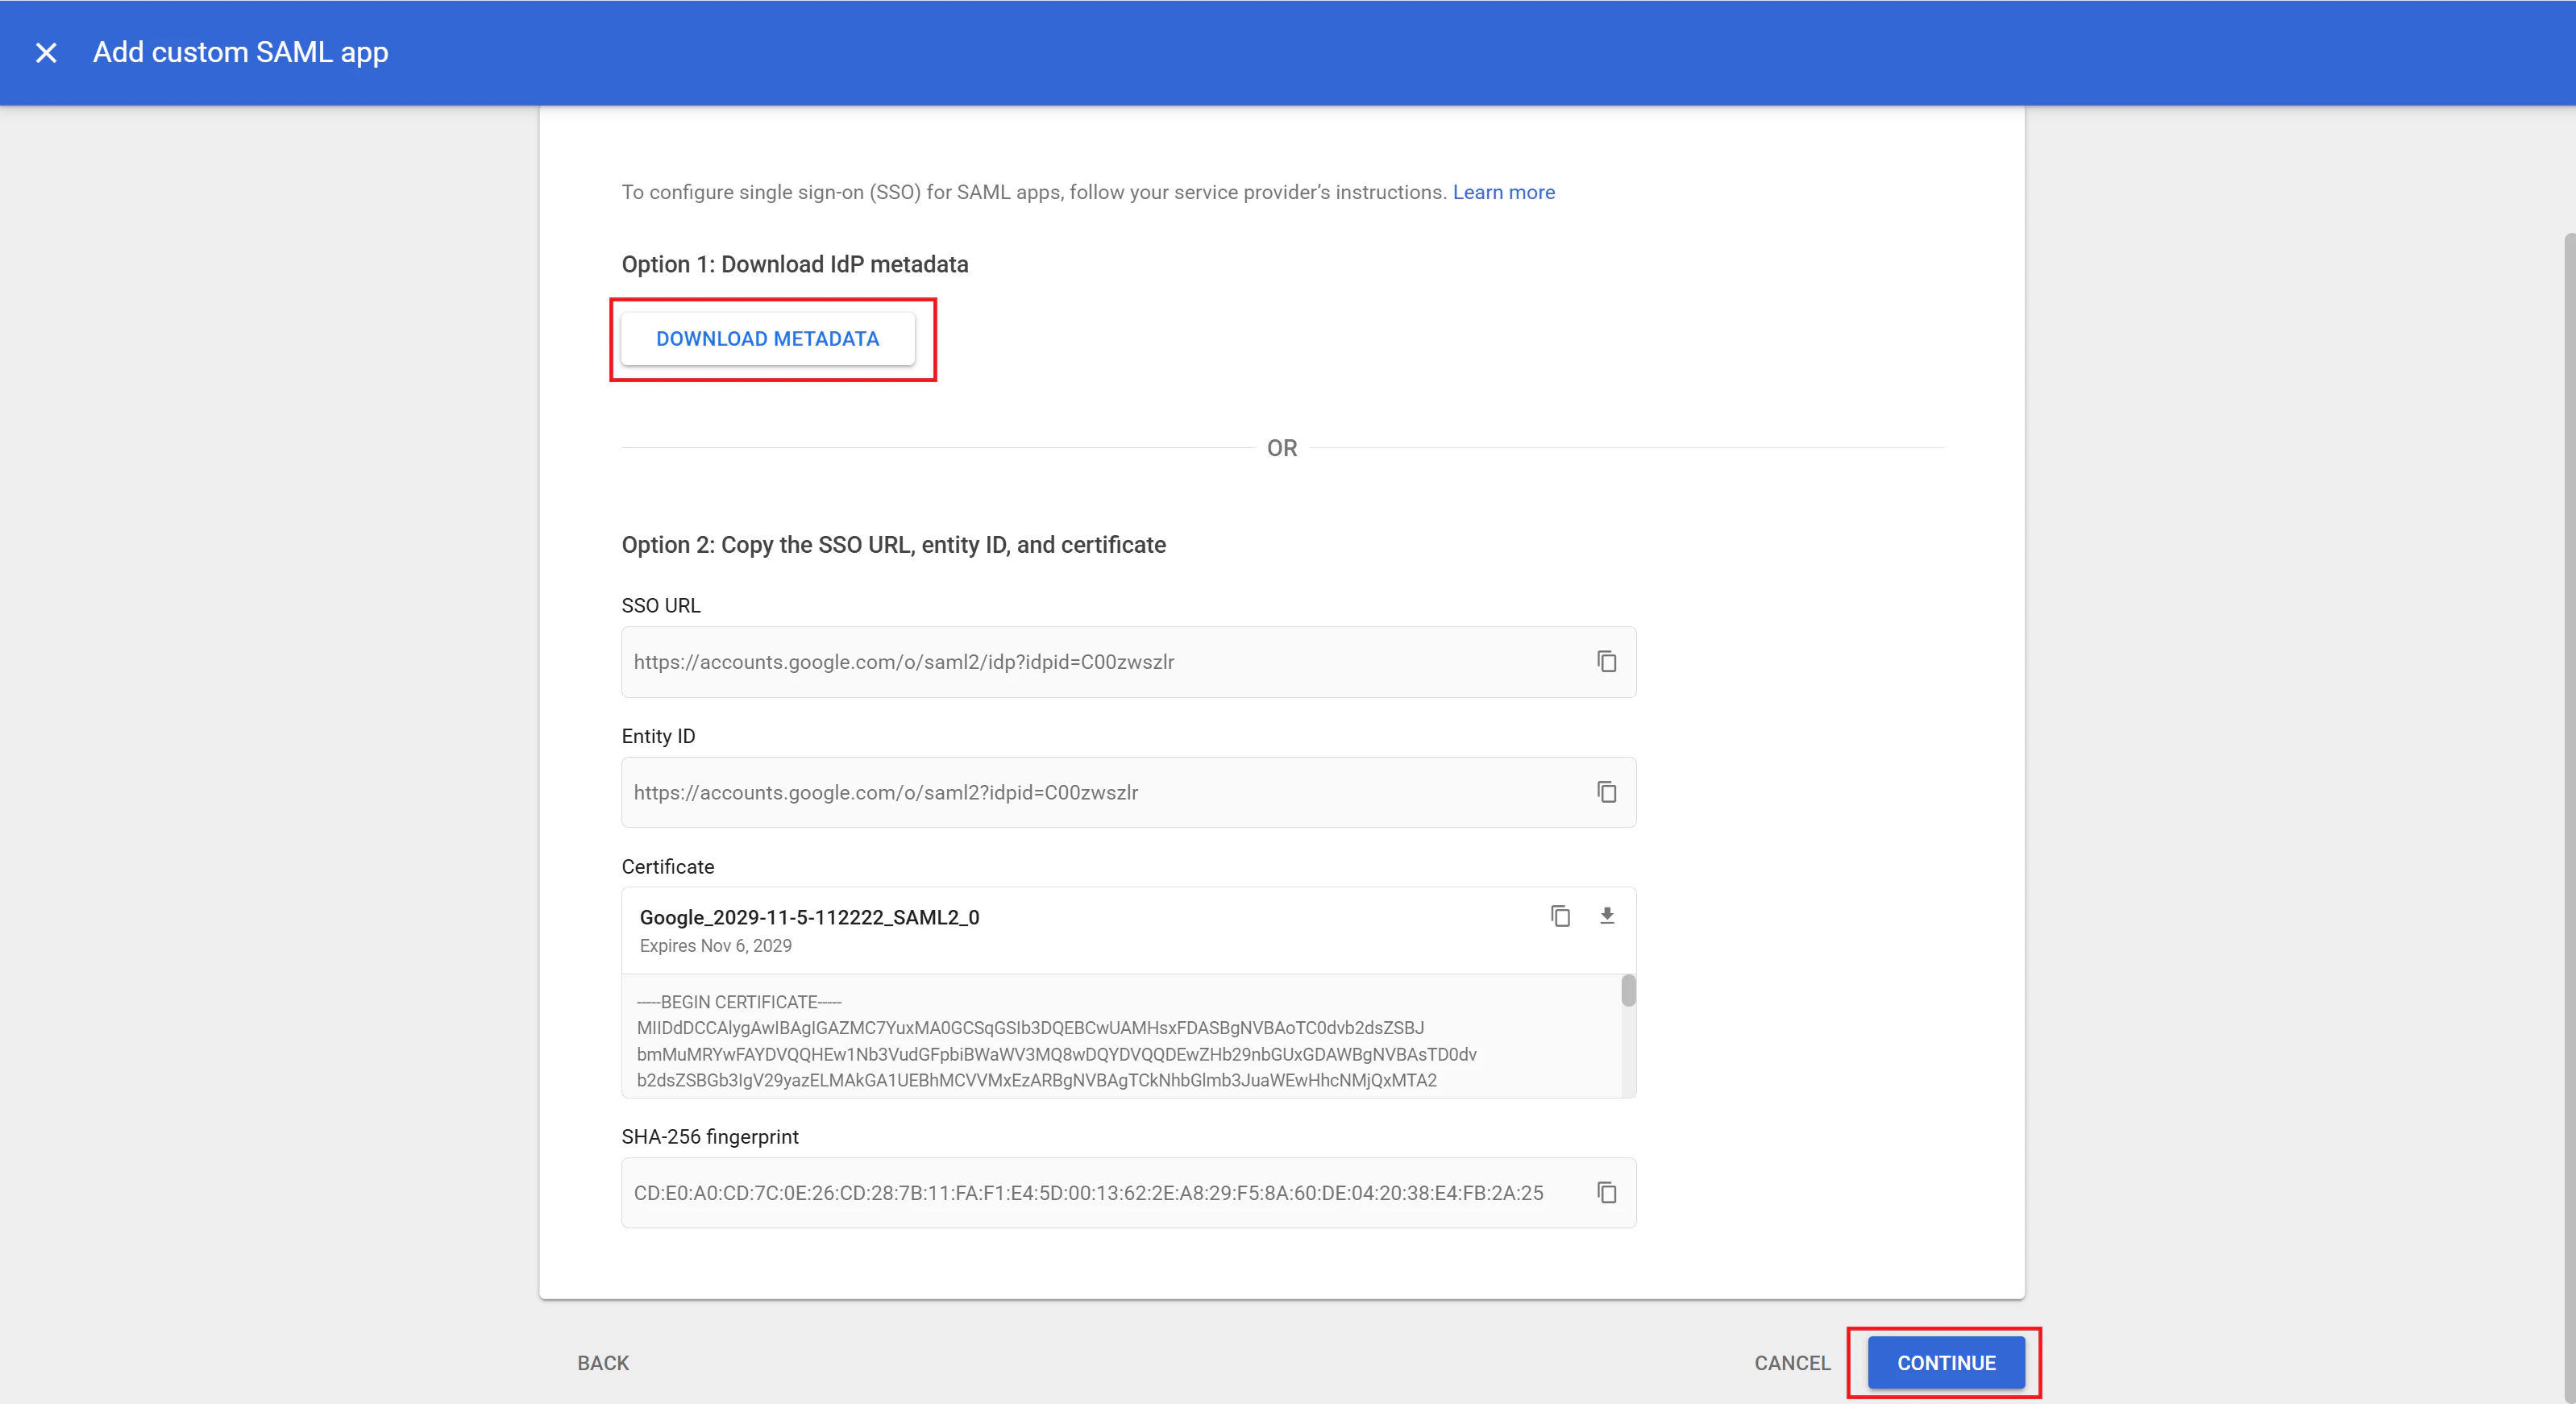
- On the Google Identity Provider details page, click Download metadata. Share the downloaded metadata file with the Slidely AI team. Click Continue.
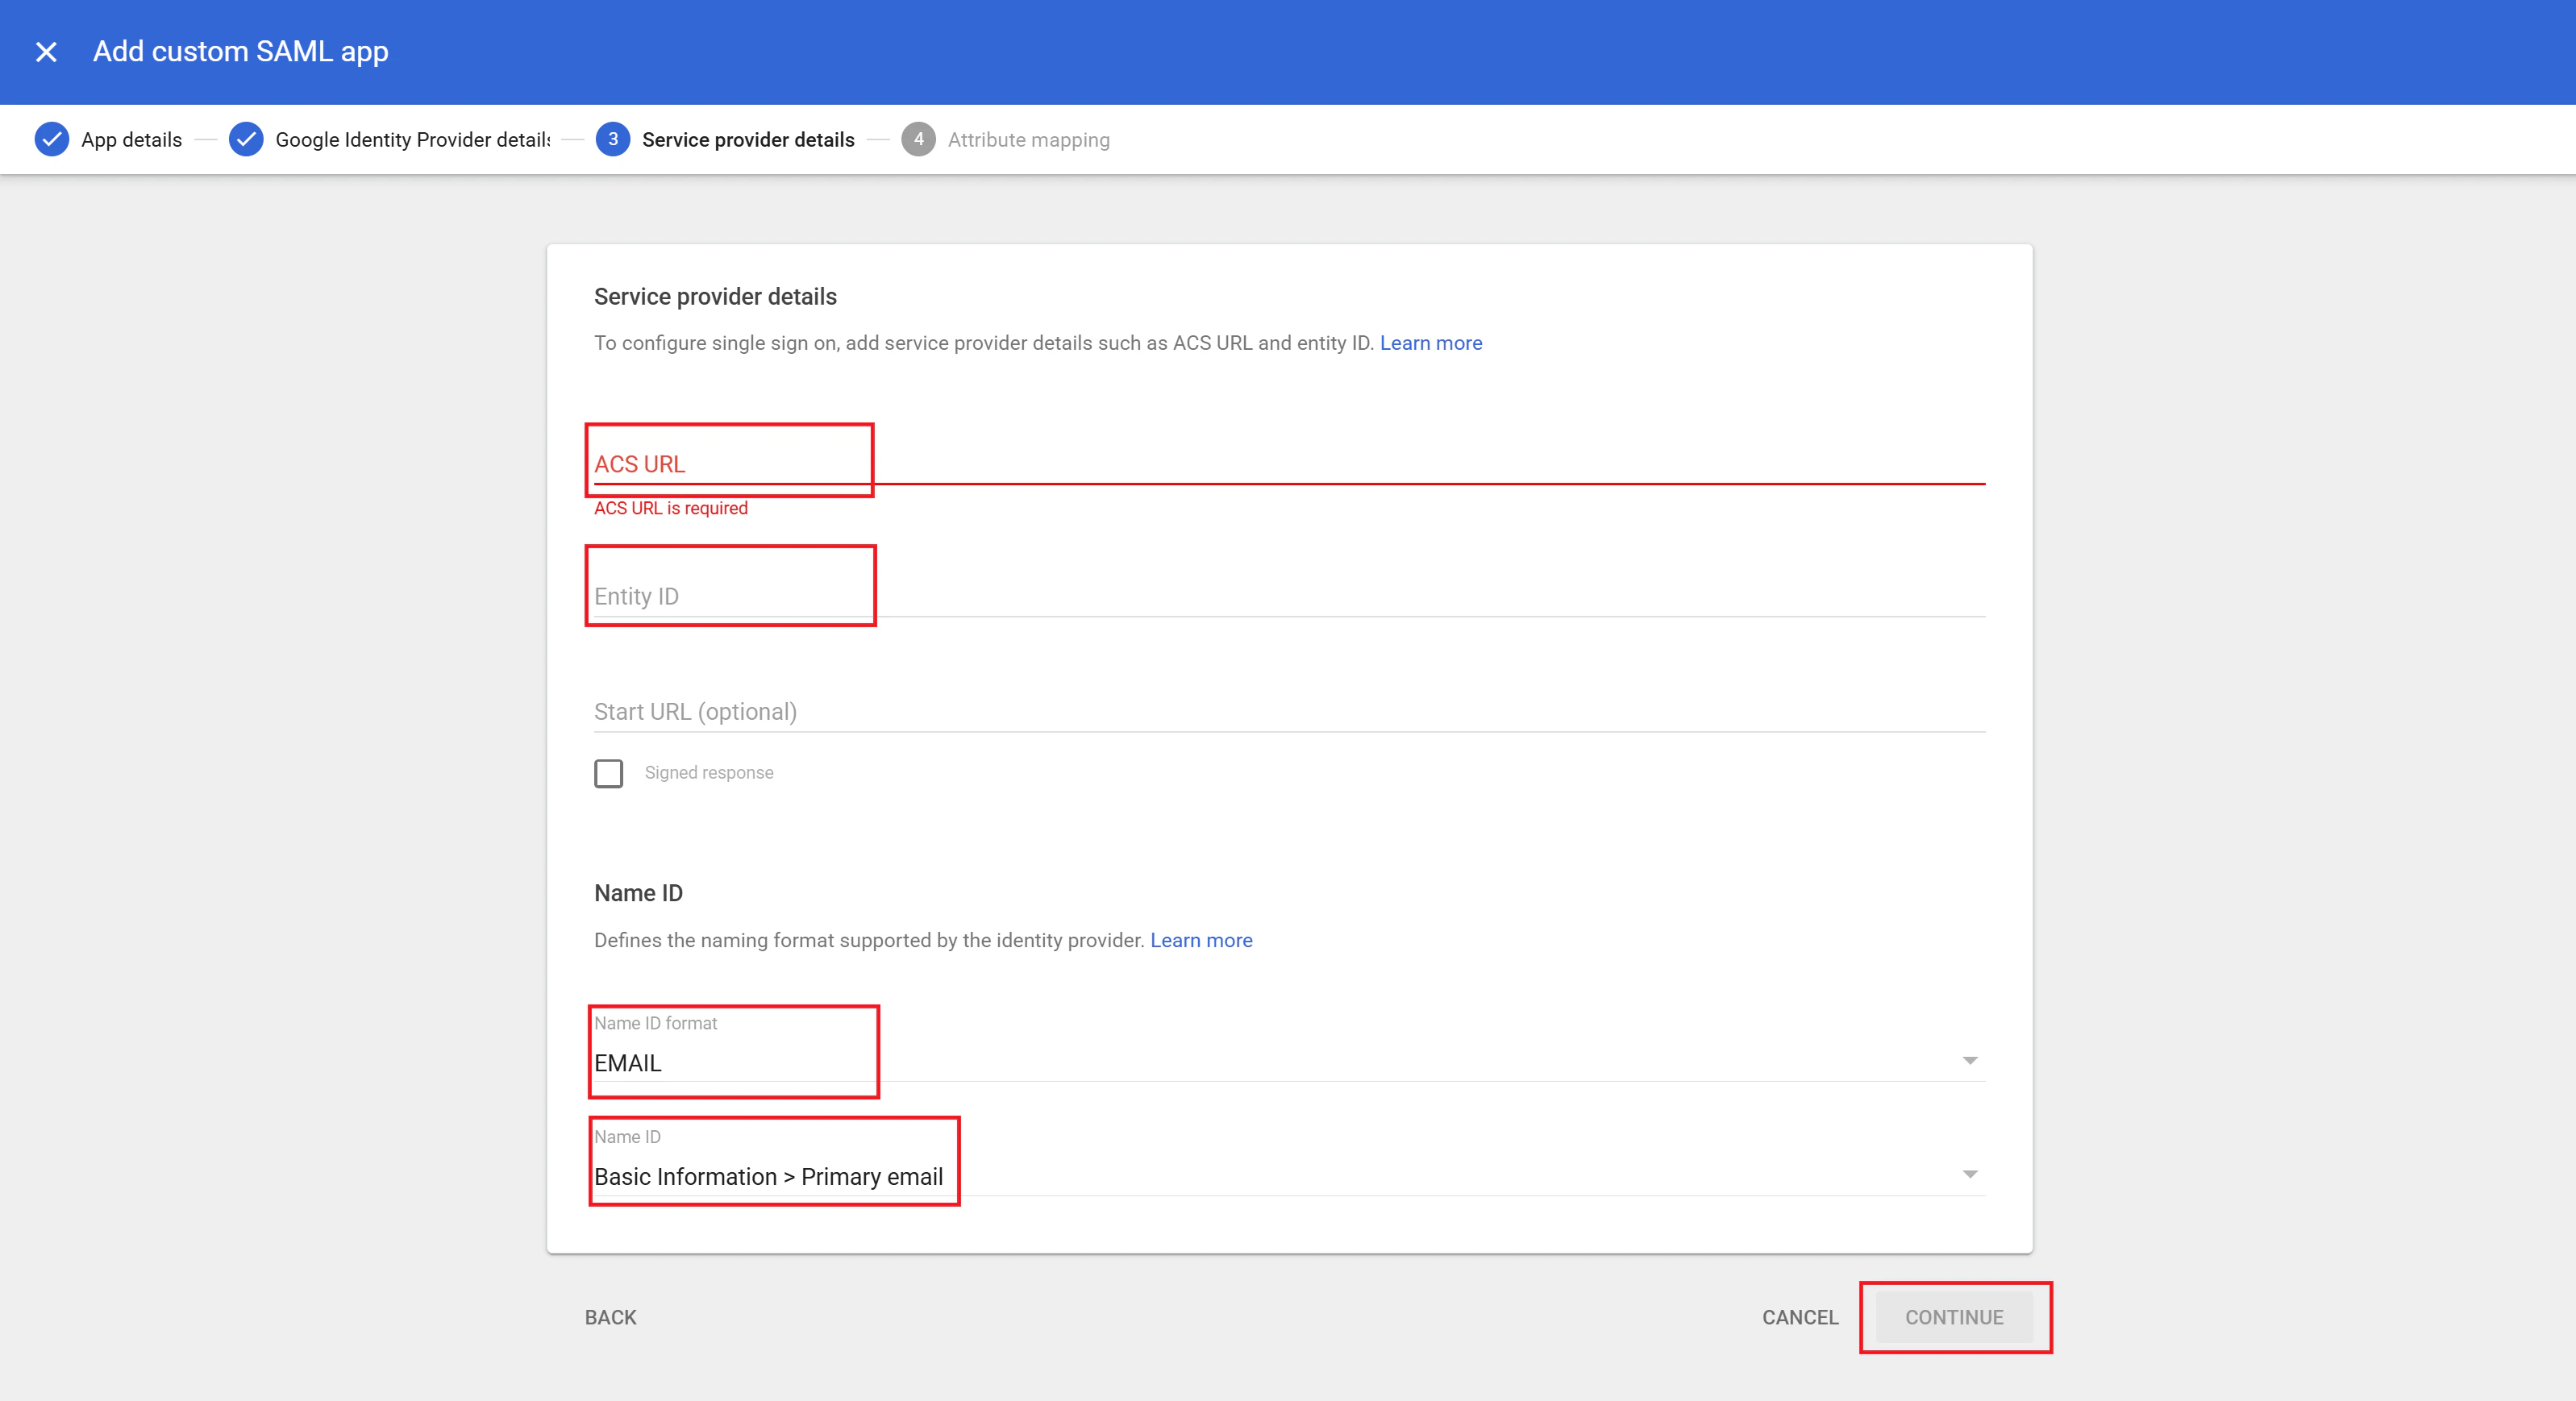
- On the Service provider details page, enter the ACS URL and Entity ID provided by the Slidely AI team. Set Name ID format to EMAIL and set Name ID to Basic Information > Primary email. Click Continue.
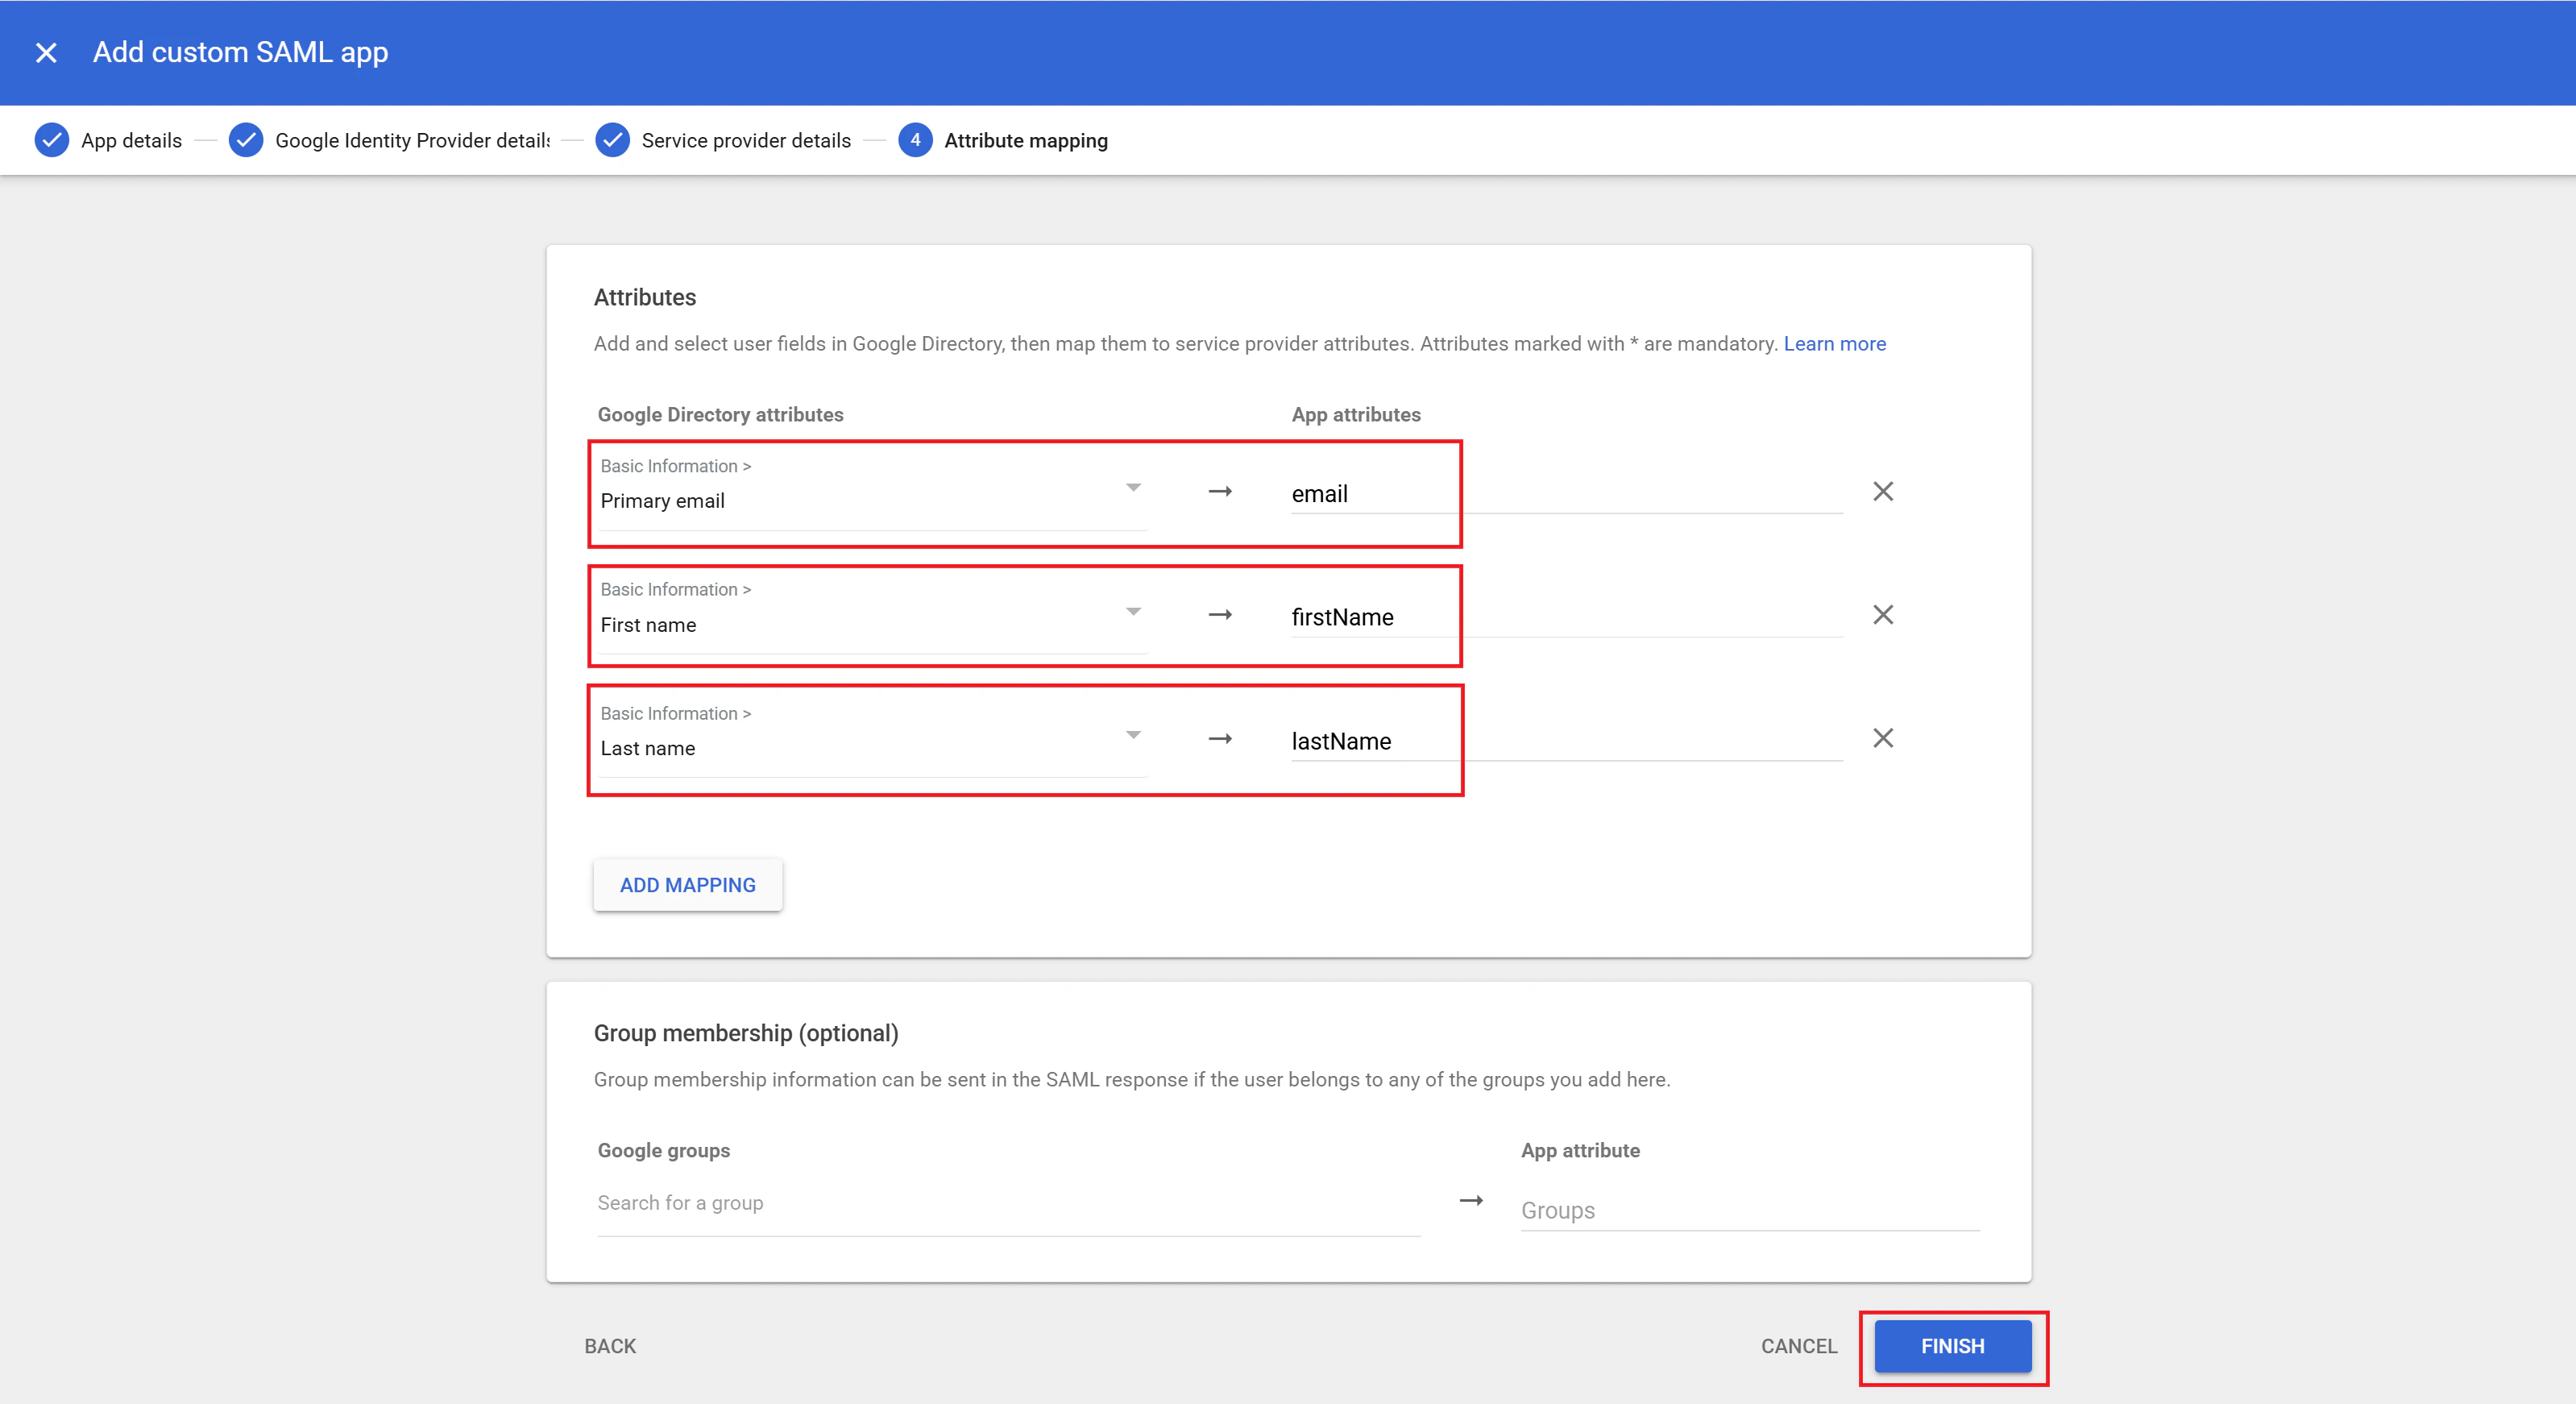
- On the Attribute mapping page, add the following mappings:
- Basic Information > Primary email →
email - Basic Information > First name →
firstName - Basic Information > Last name →
lastNameClick Finish.
- Basic Information > Primary email →
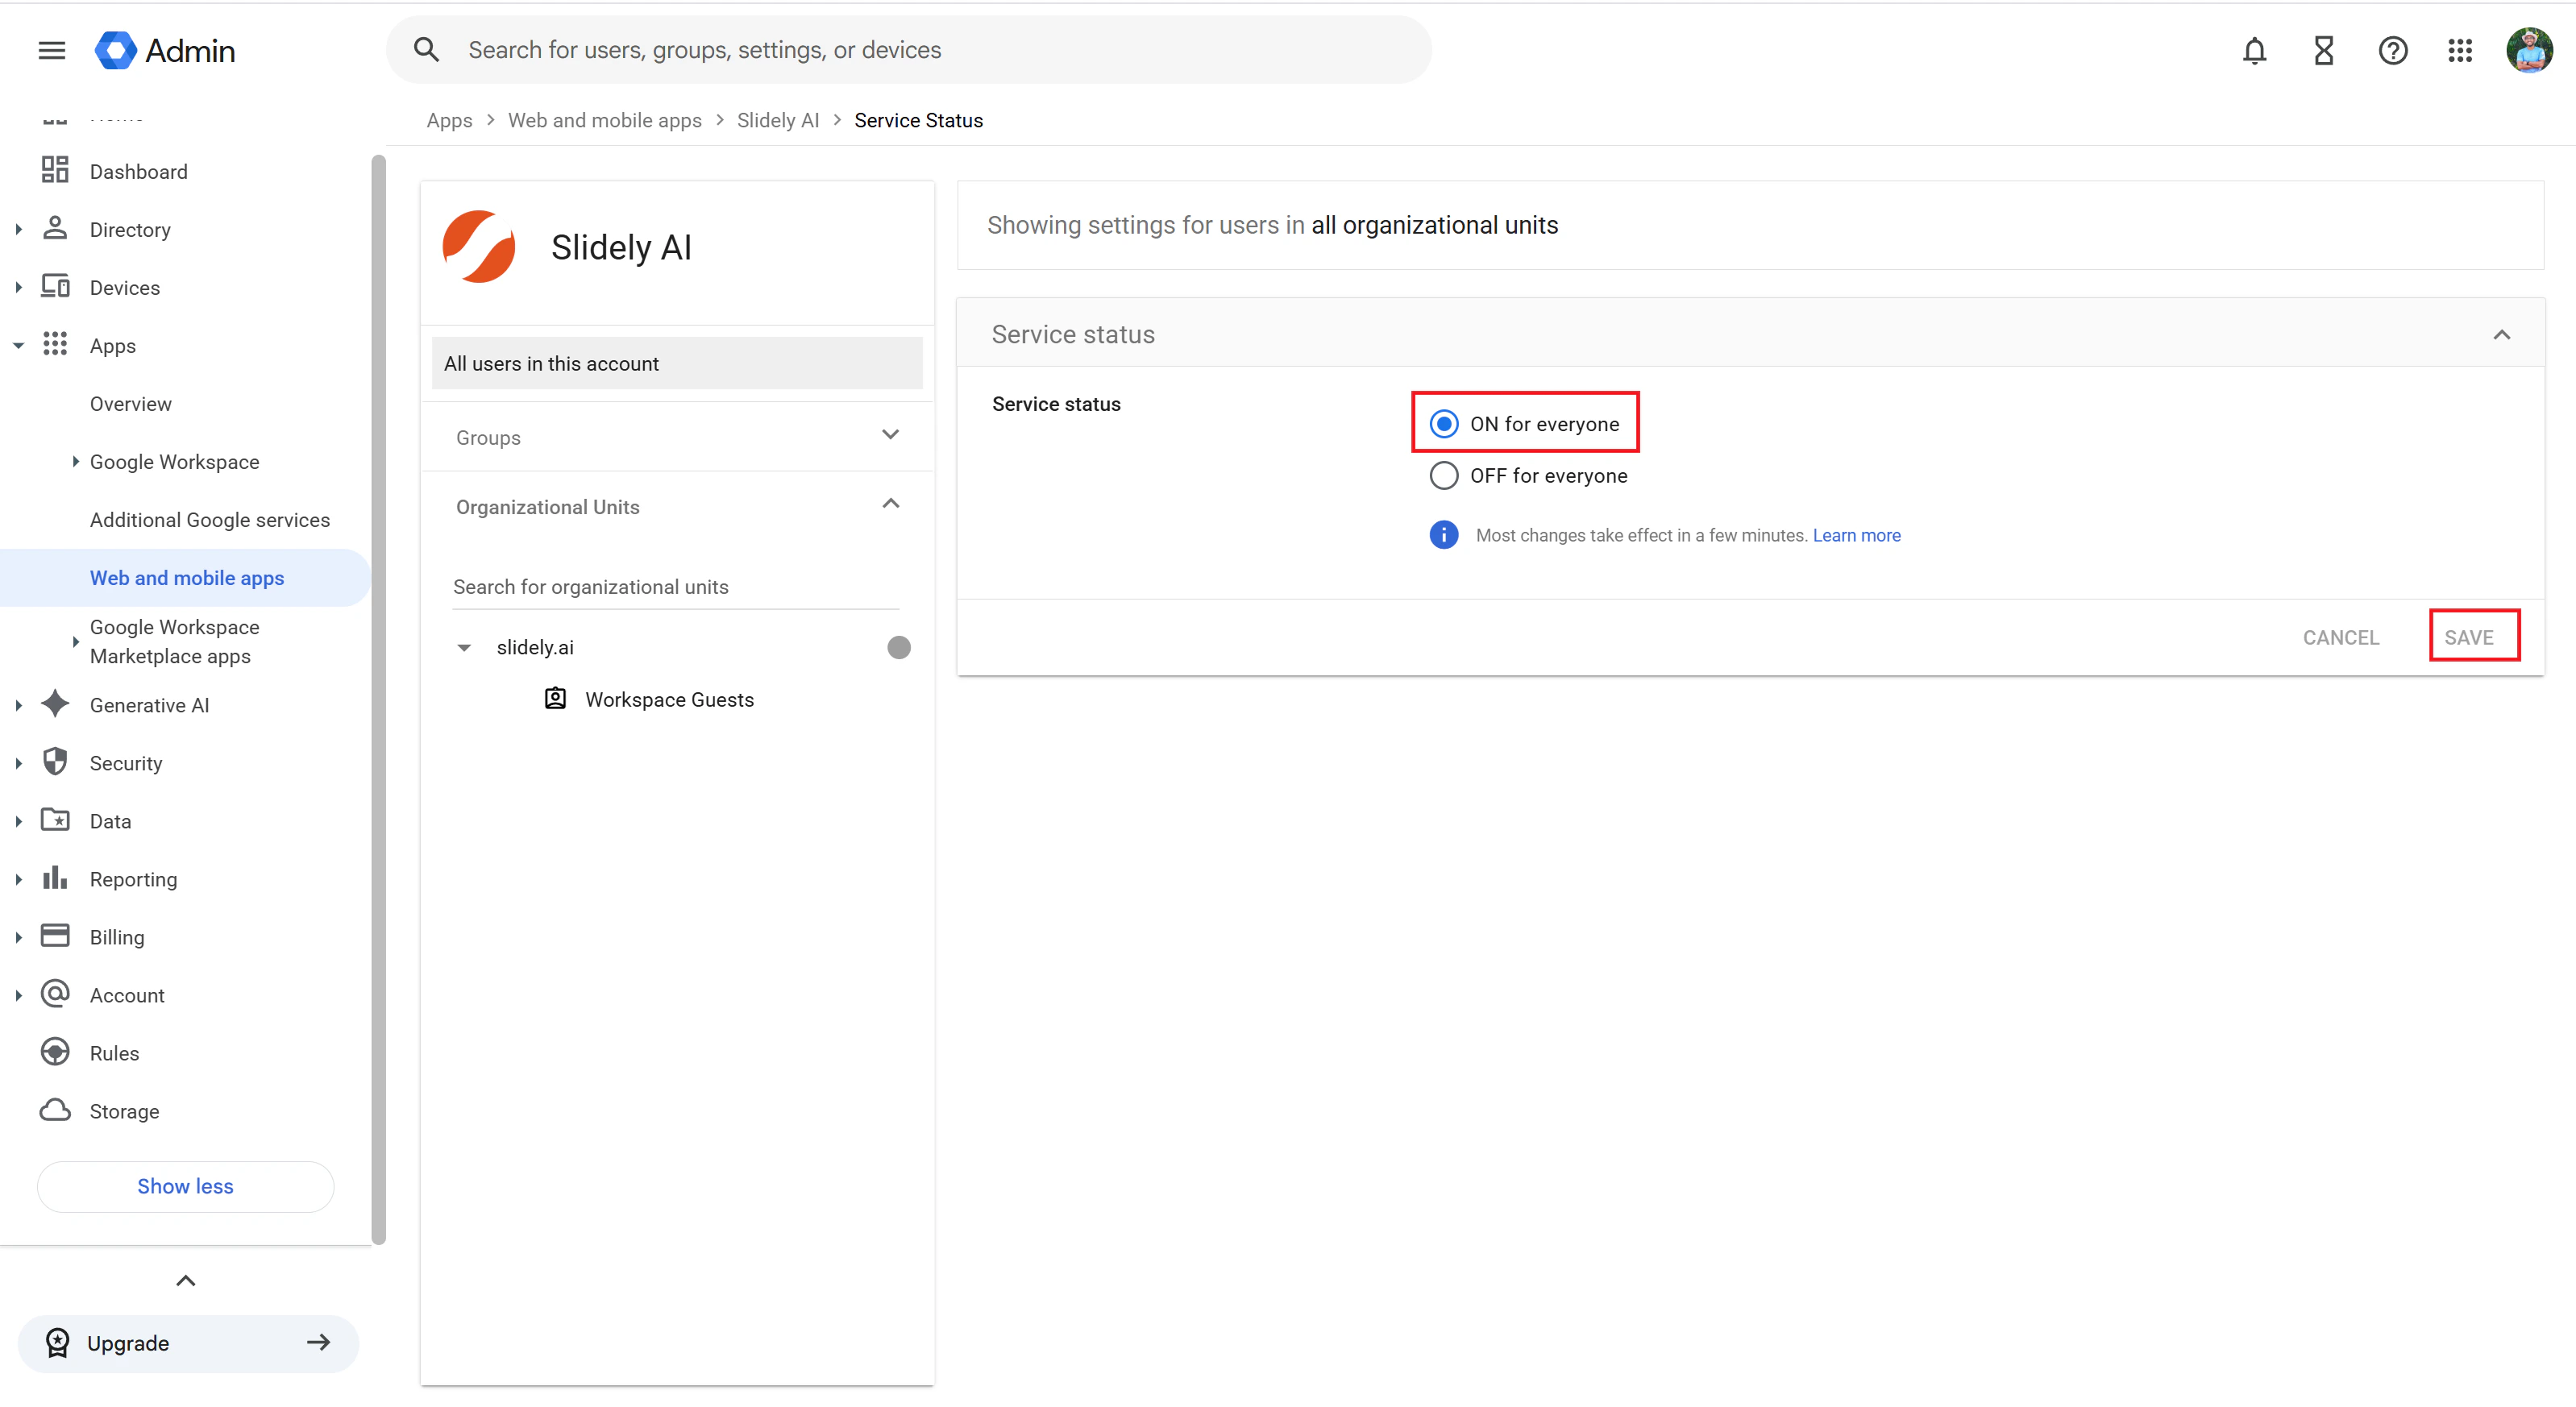
- Open the newly created Slidely AI SAML app and click User access.
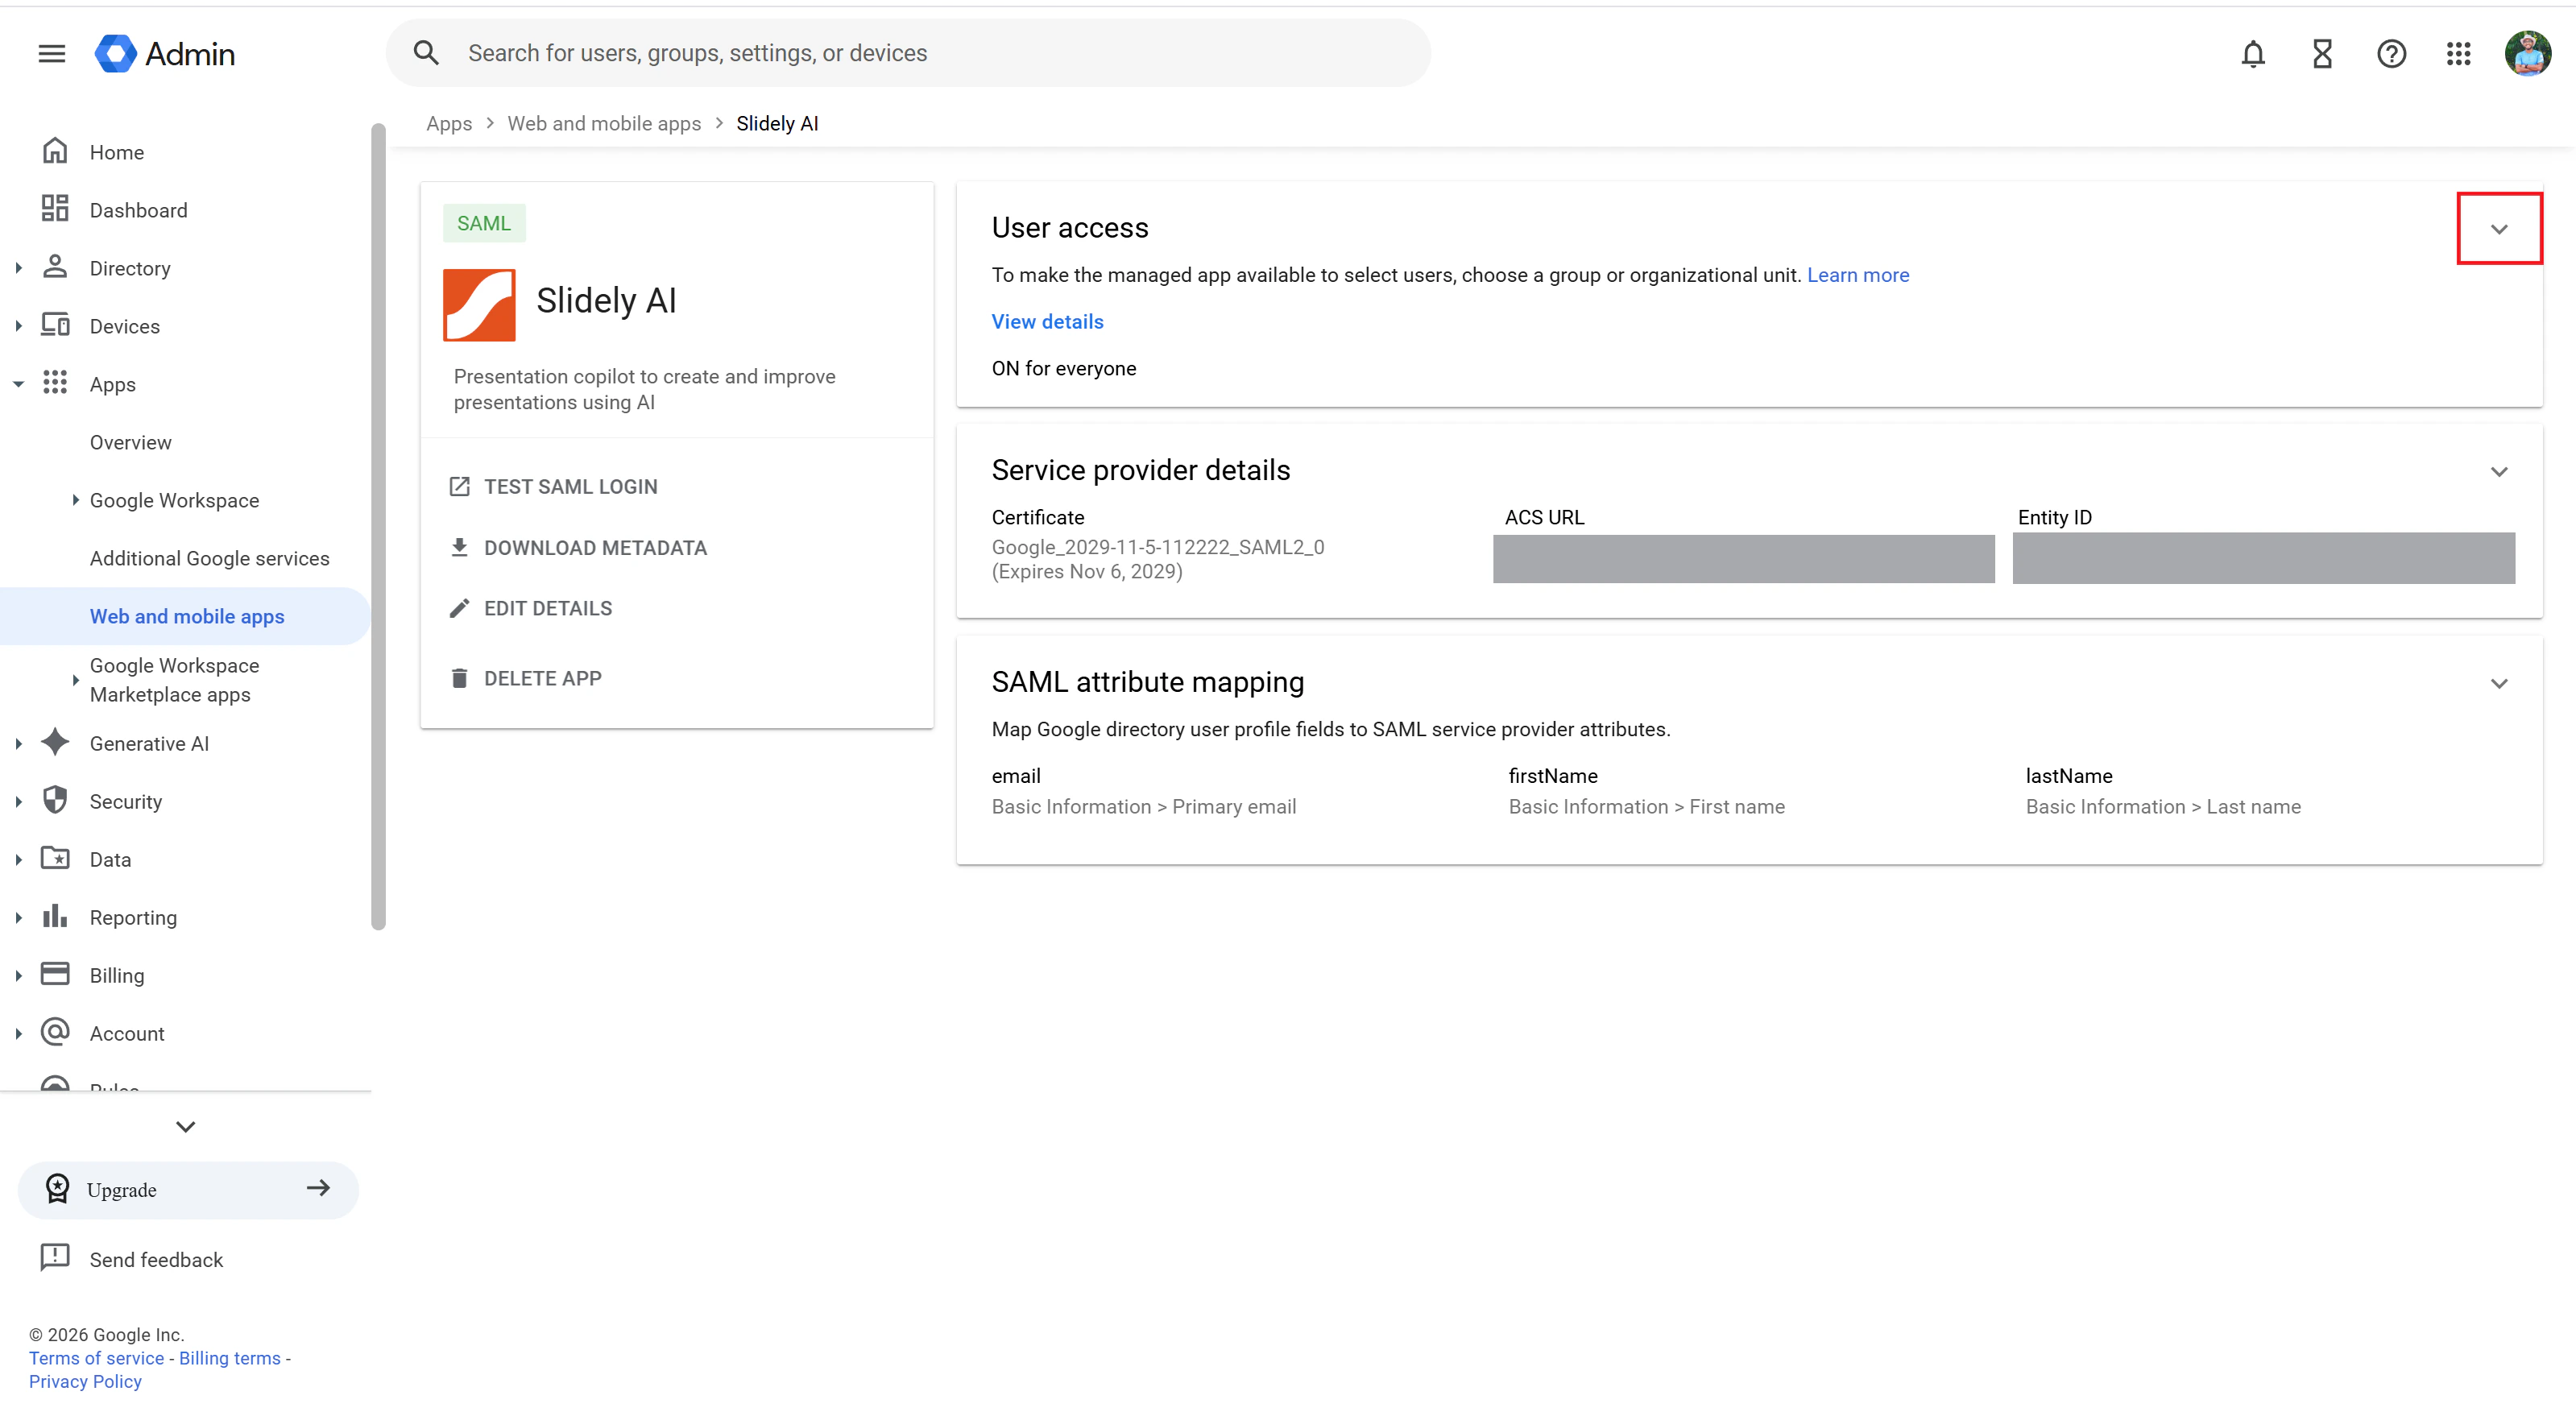
- Turn the app ON for everyone, or enable it for the required organizational units or groups. Click Save.
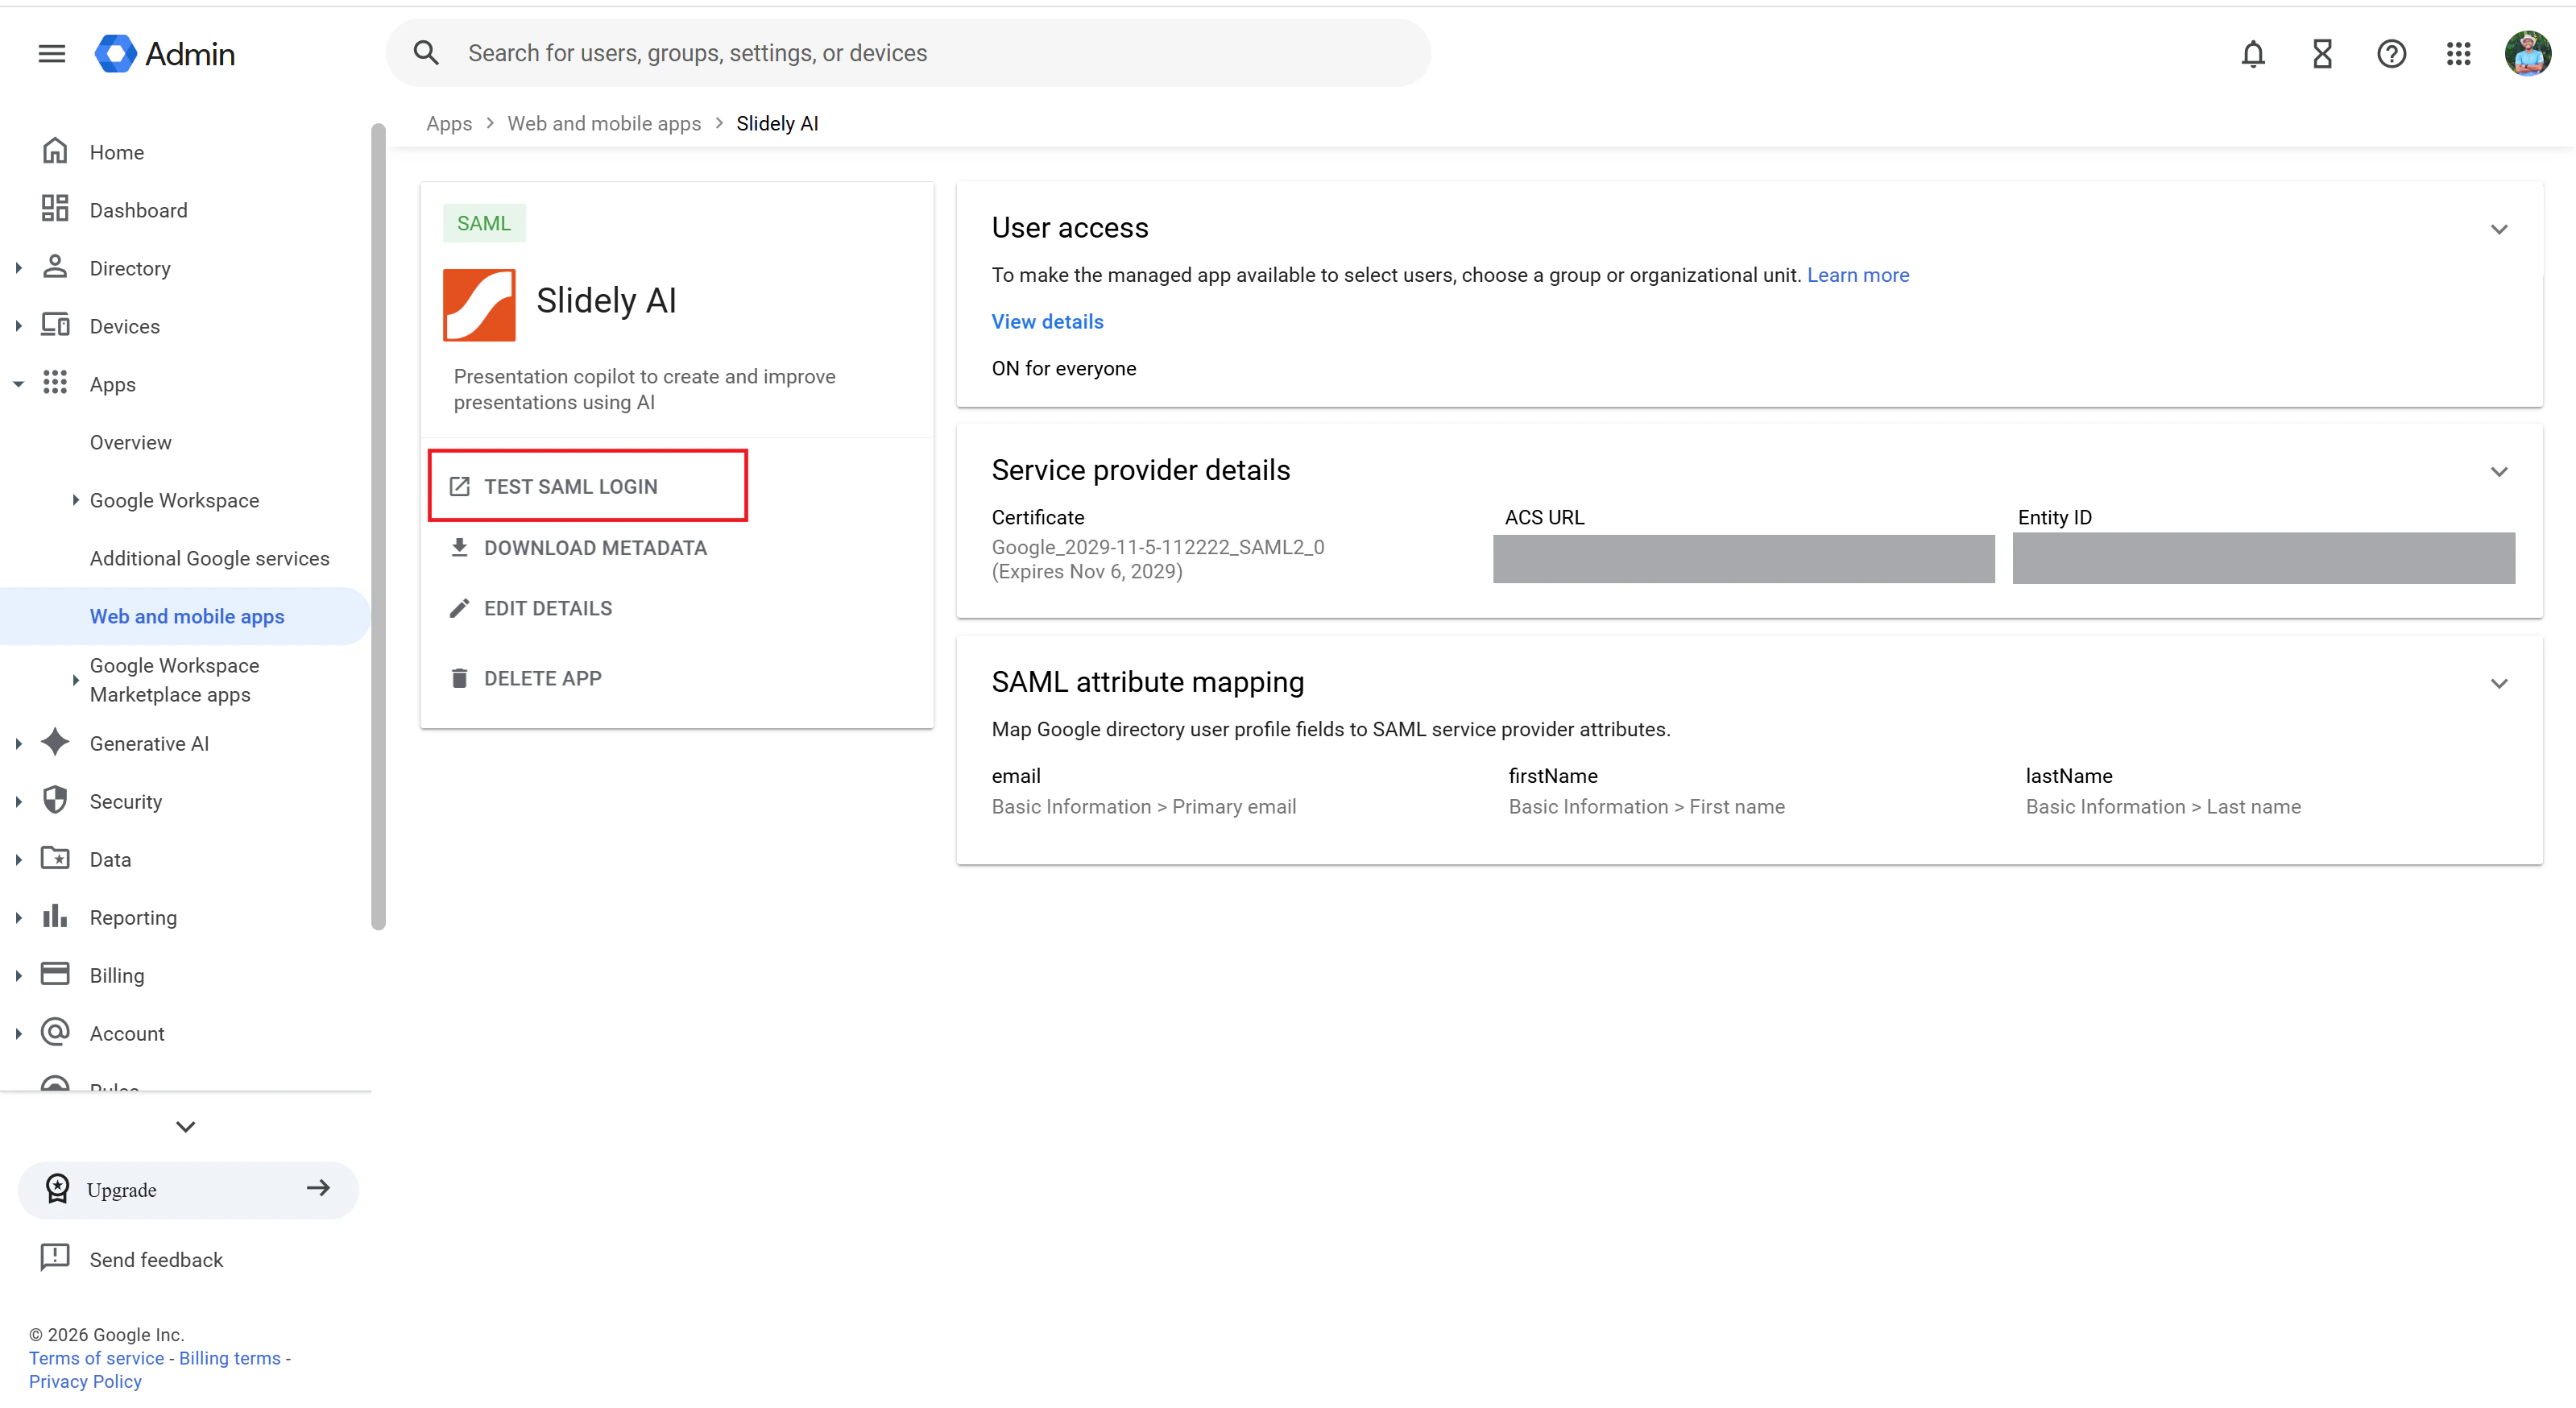
- Once SSO is configured from Slidely AI’s end, open the Slidely AI SAML app again and click Test SAML login to verify the setup.