This setup requires the Slidely SSO Metadata file. If this file hasn’t been shared with you, please contact your account POC.
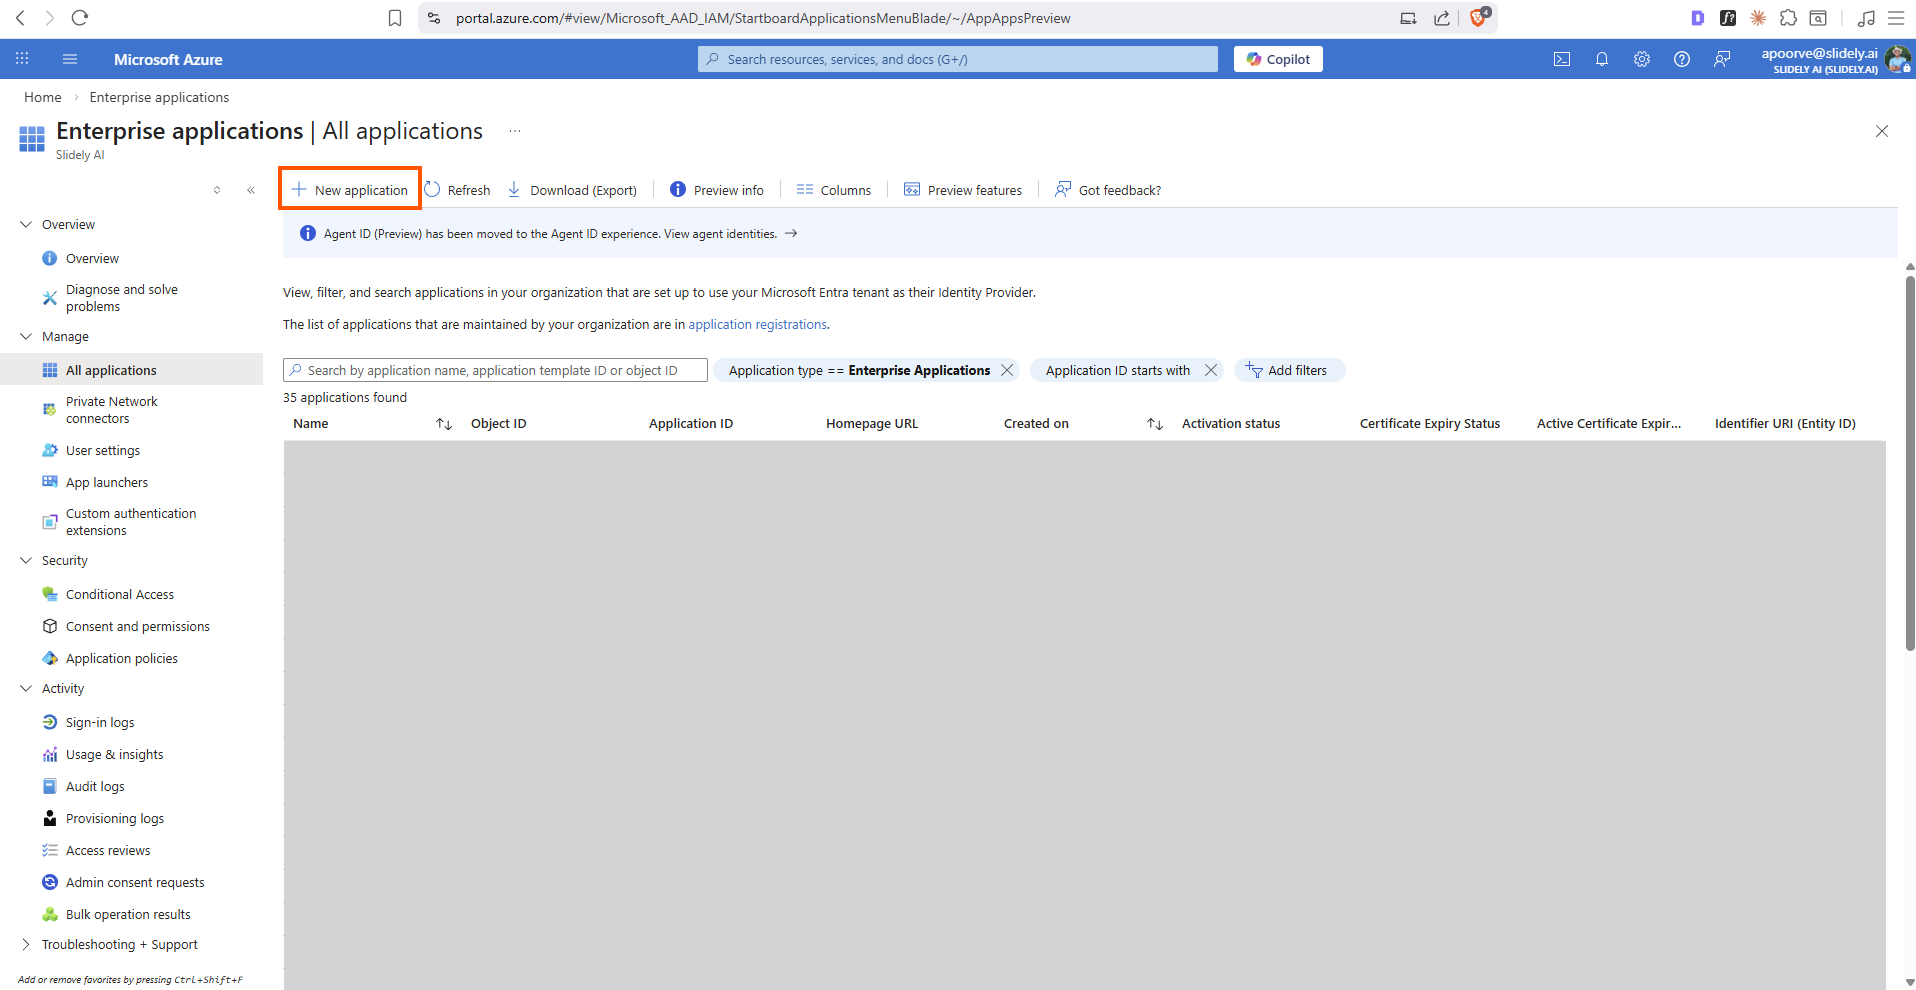
- Open Microsoft Azure Enterprise applications page. Click New application.
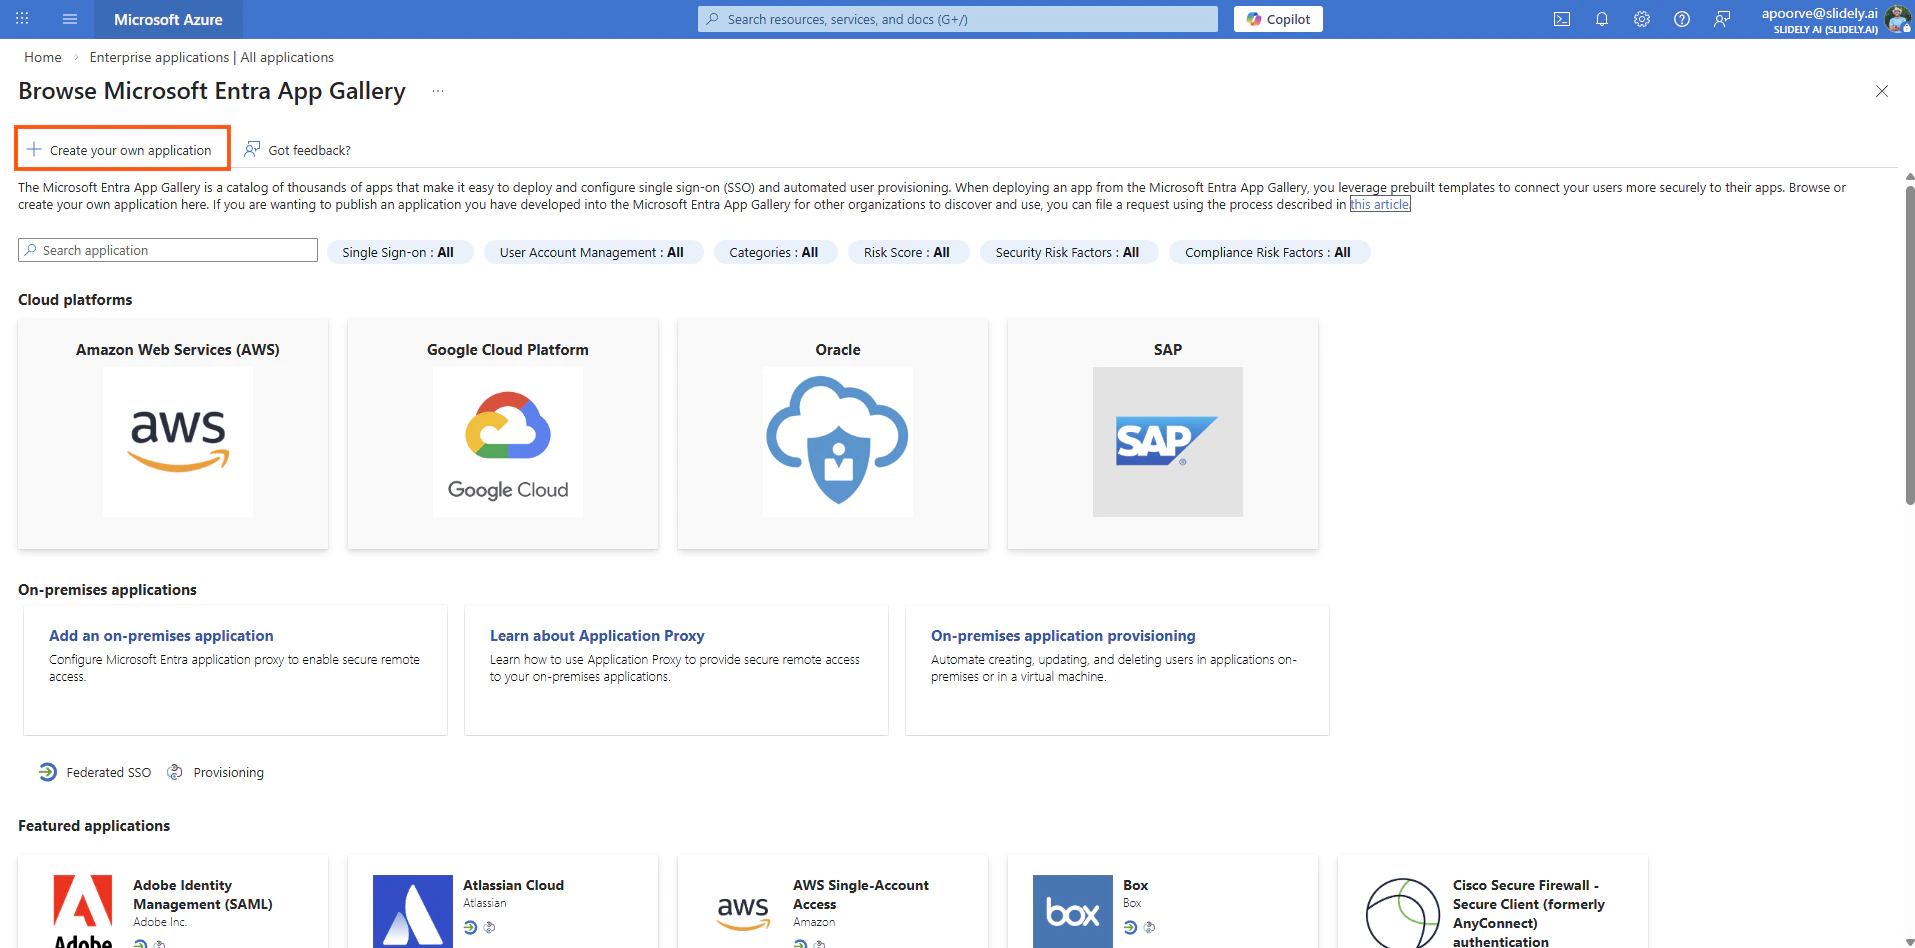
- Click Create your own application.
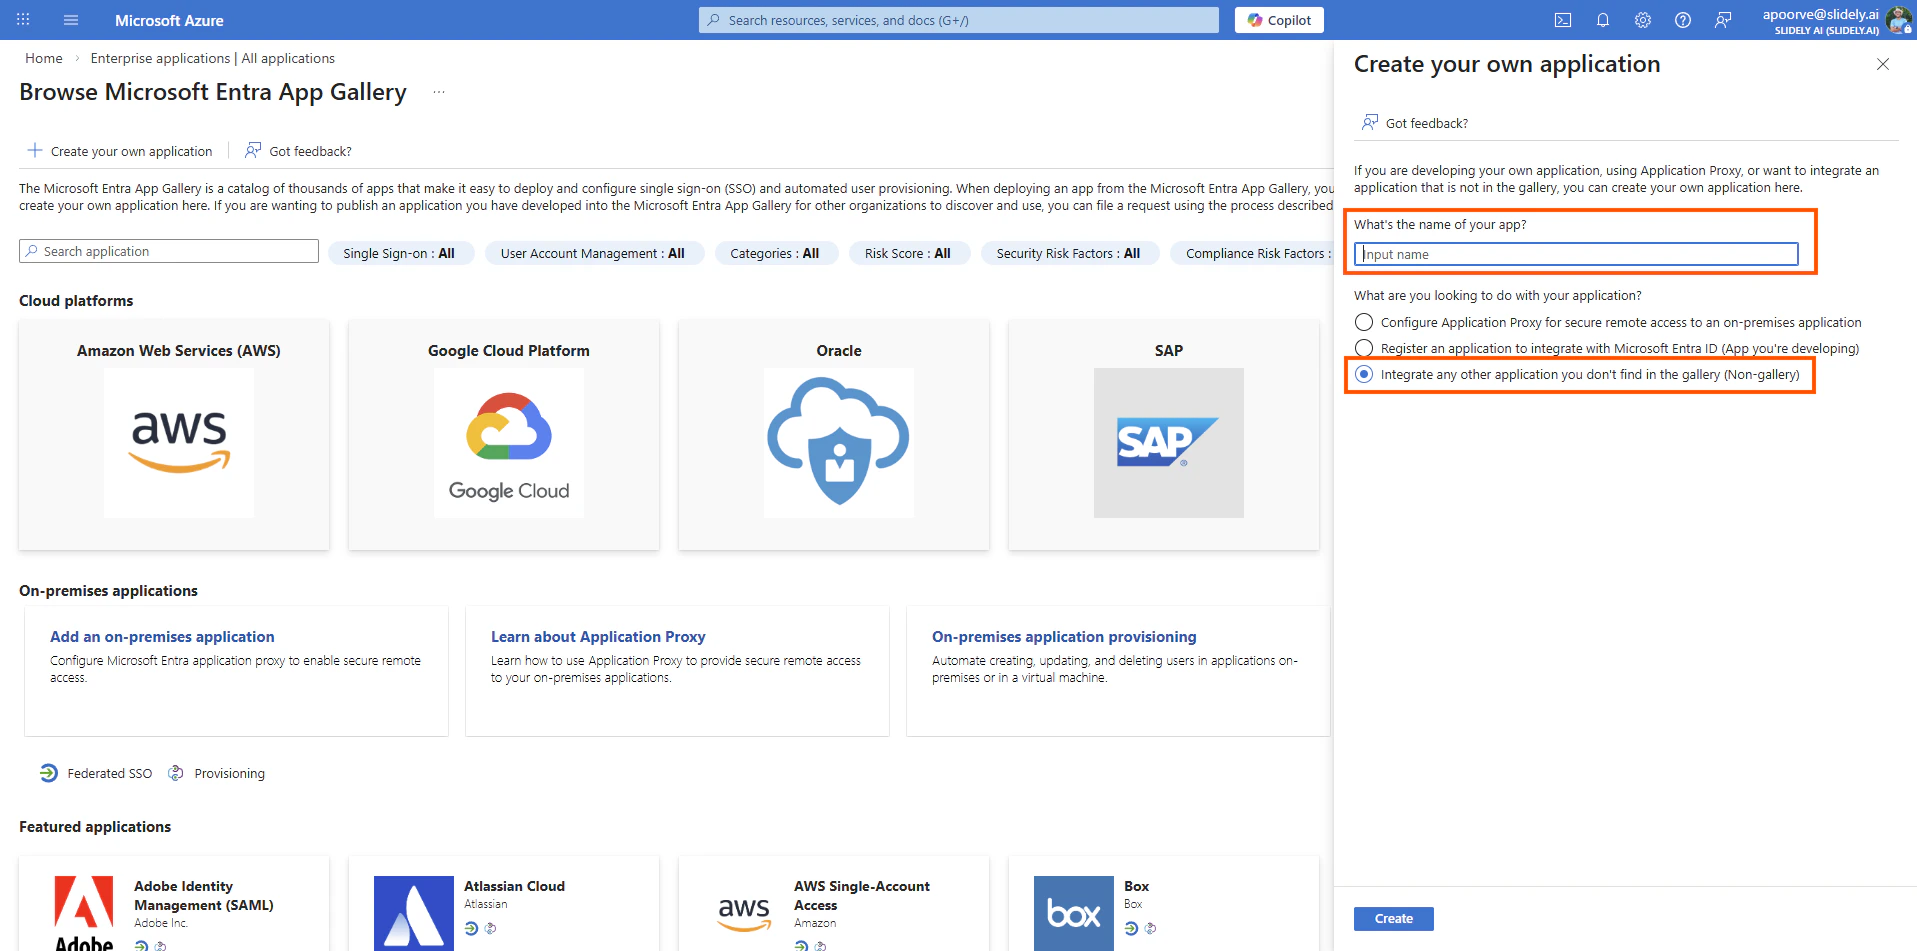
- Enter Slidely AI as the name of the app and select Integrate any other application you don’t find in the gallery (Non-gallery)
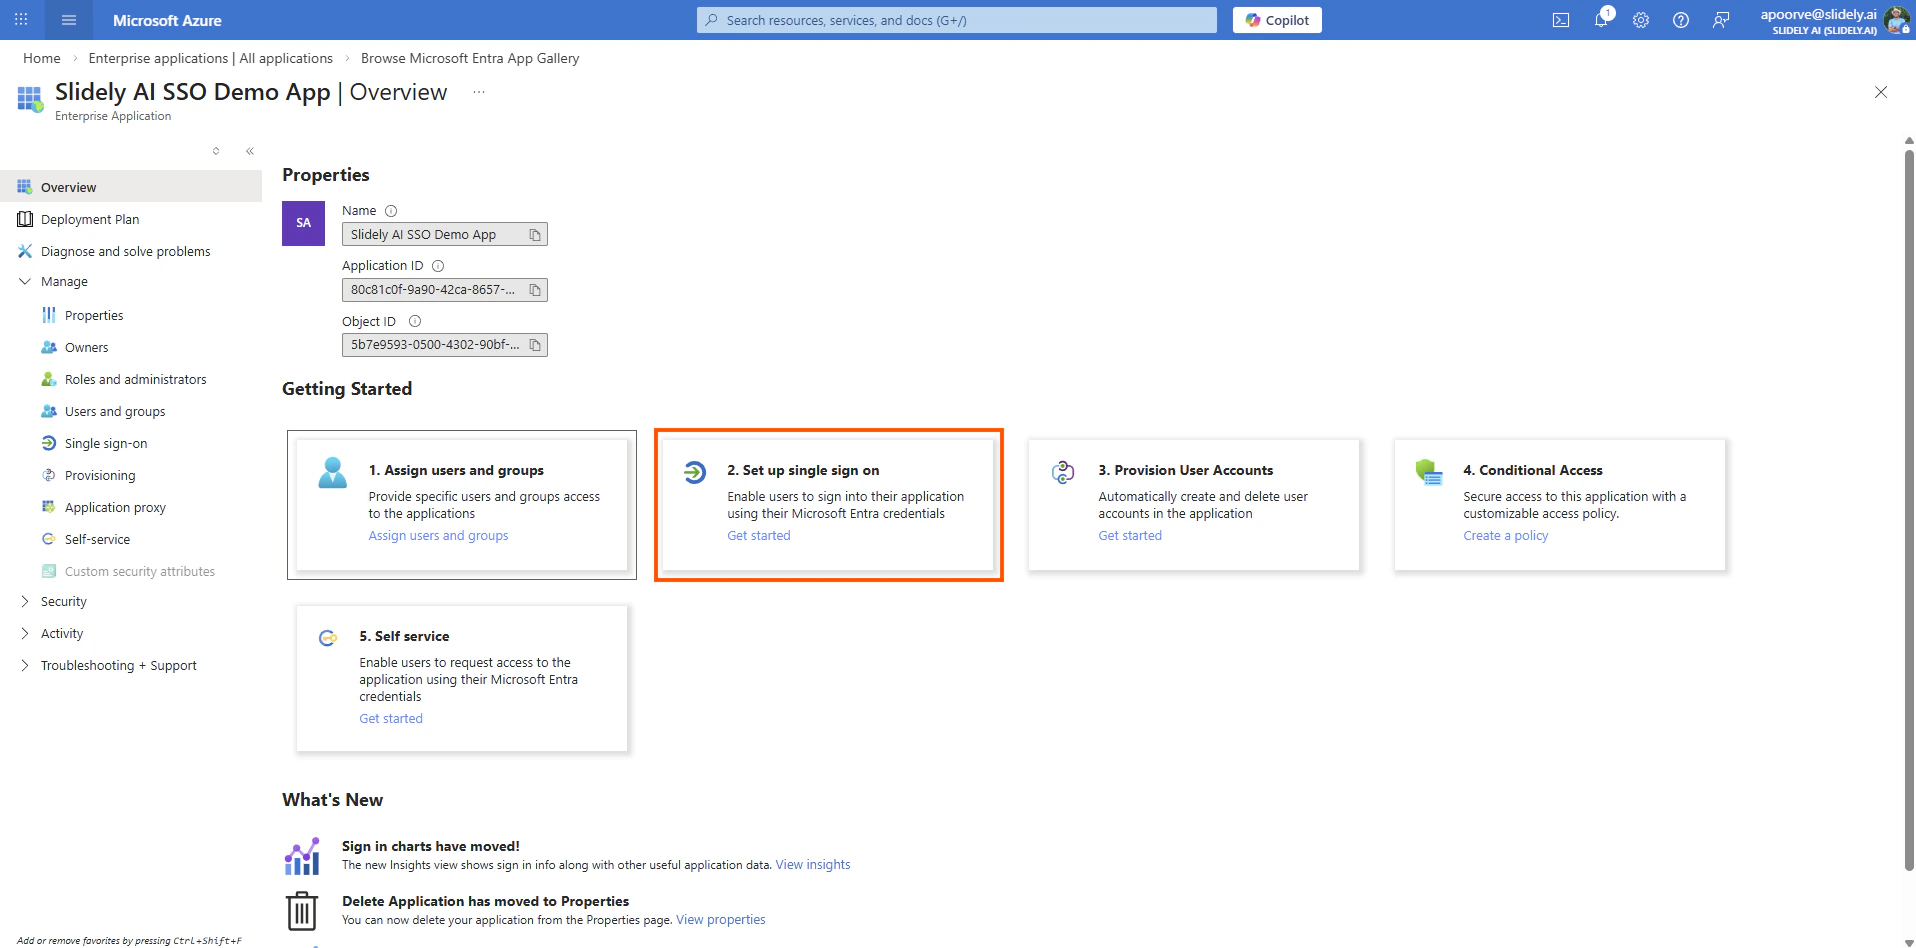
- Click on Get Started inside 2. Set up single sign on
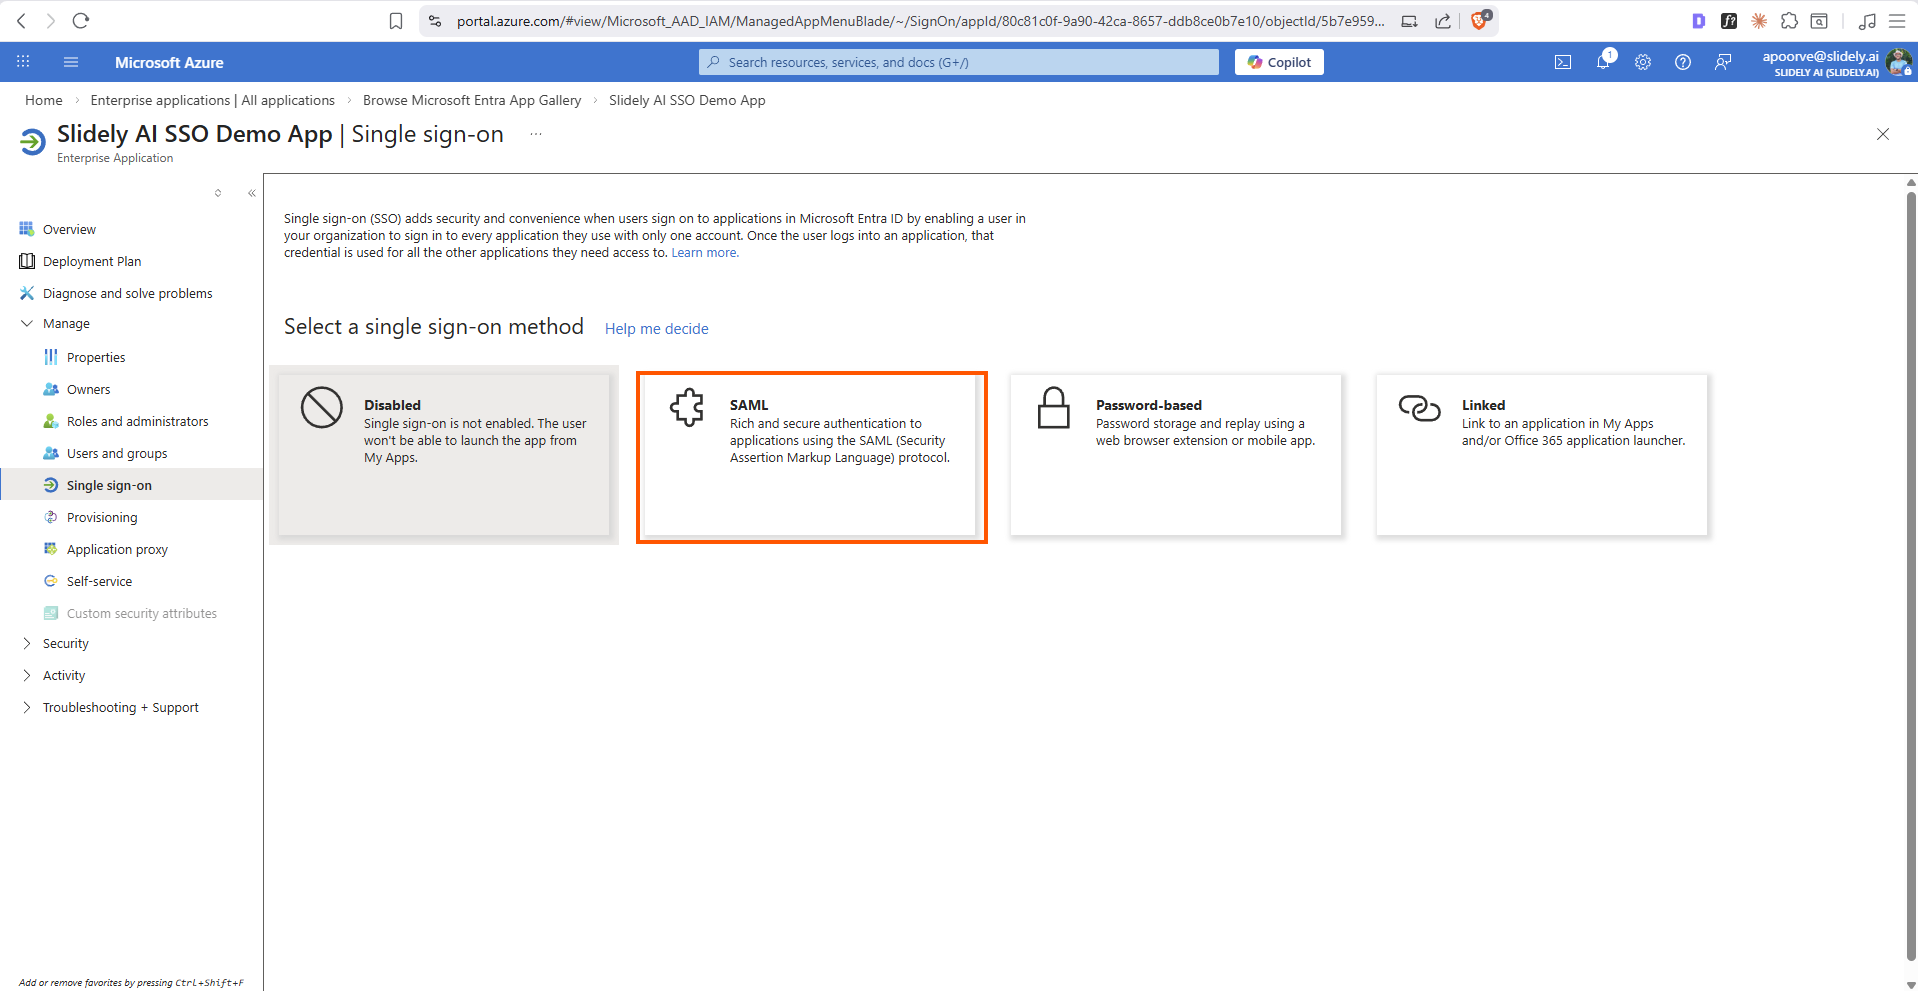
- Click SAML
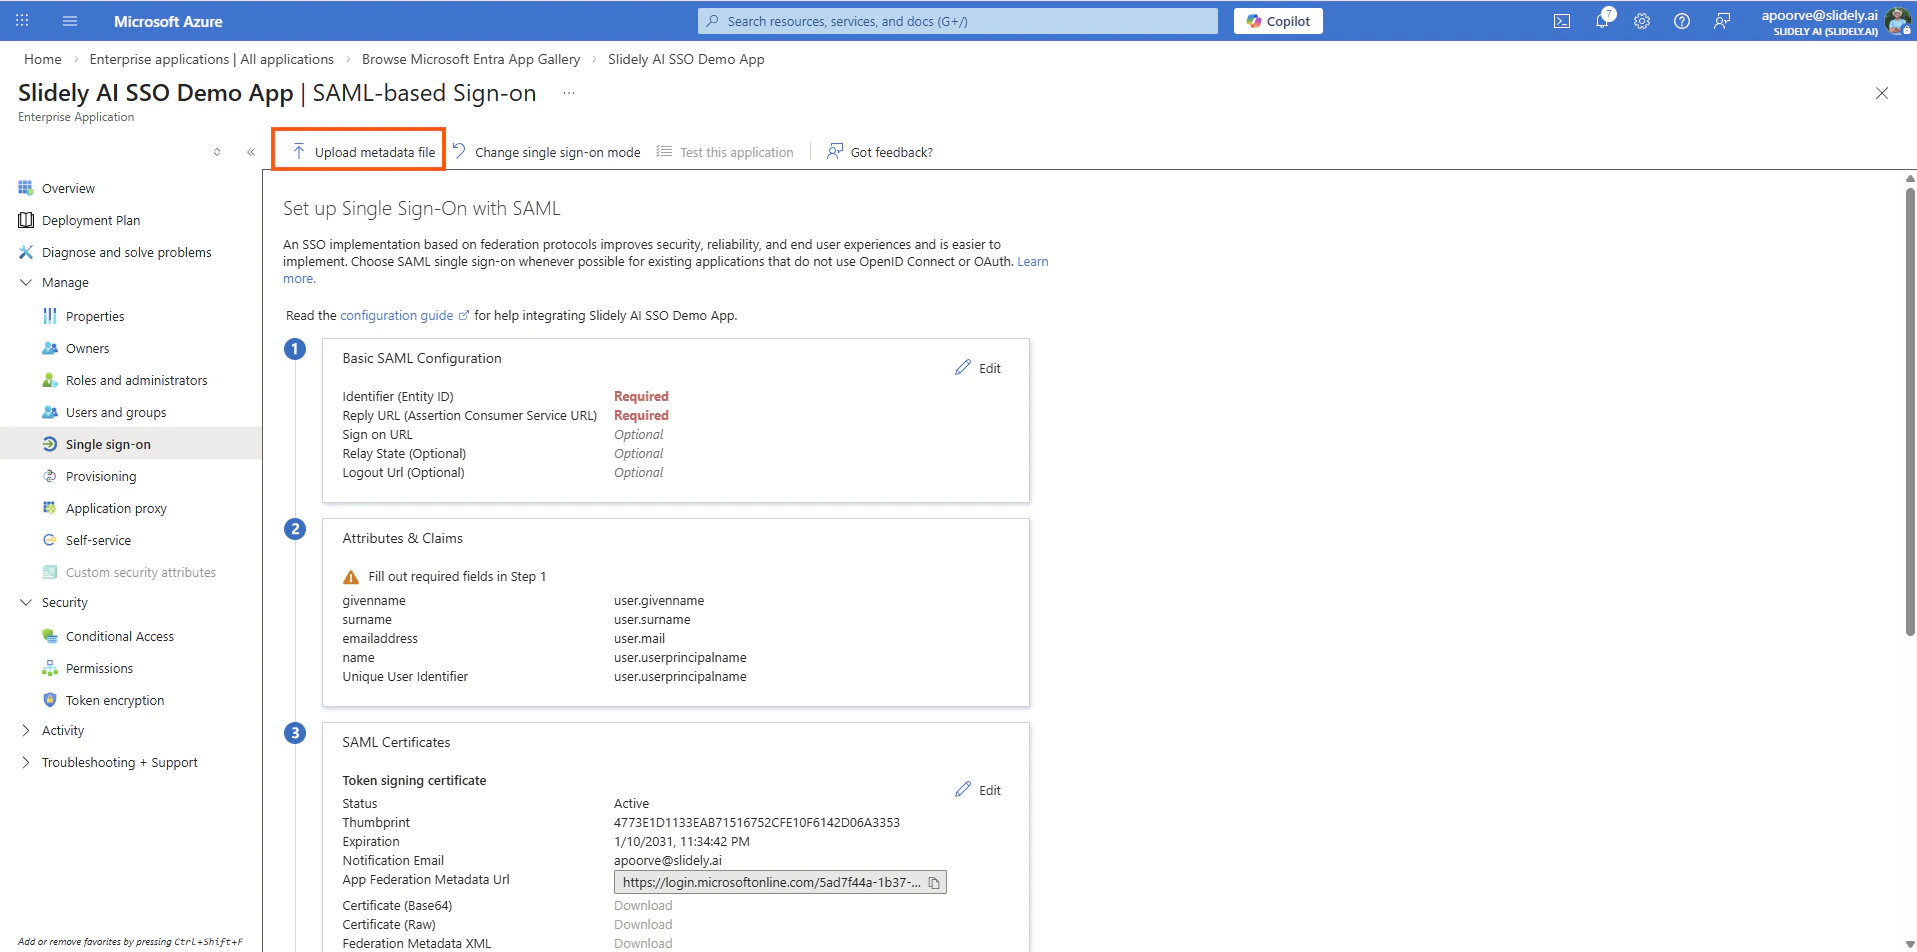
- Select Upload metadata file on the SAML page.
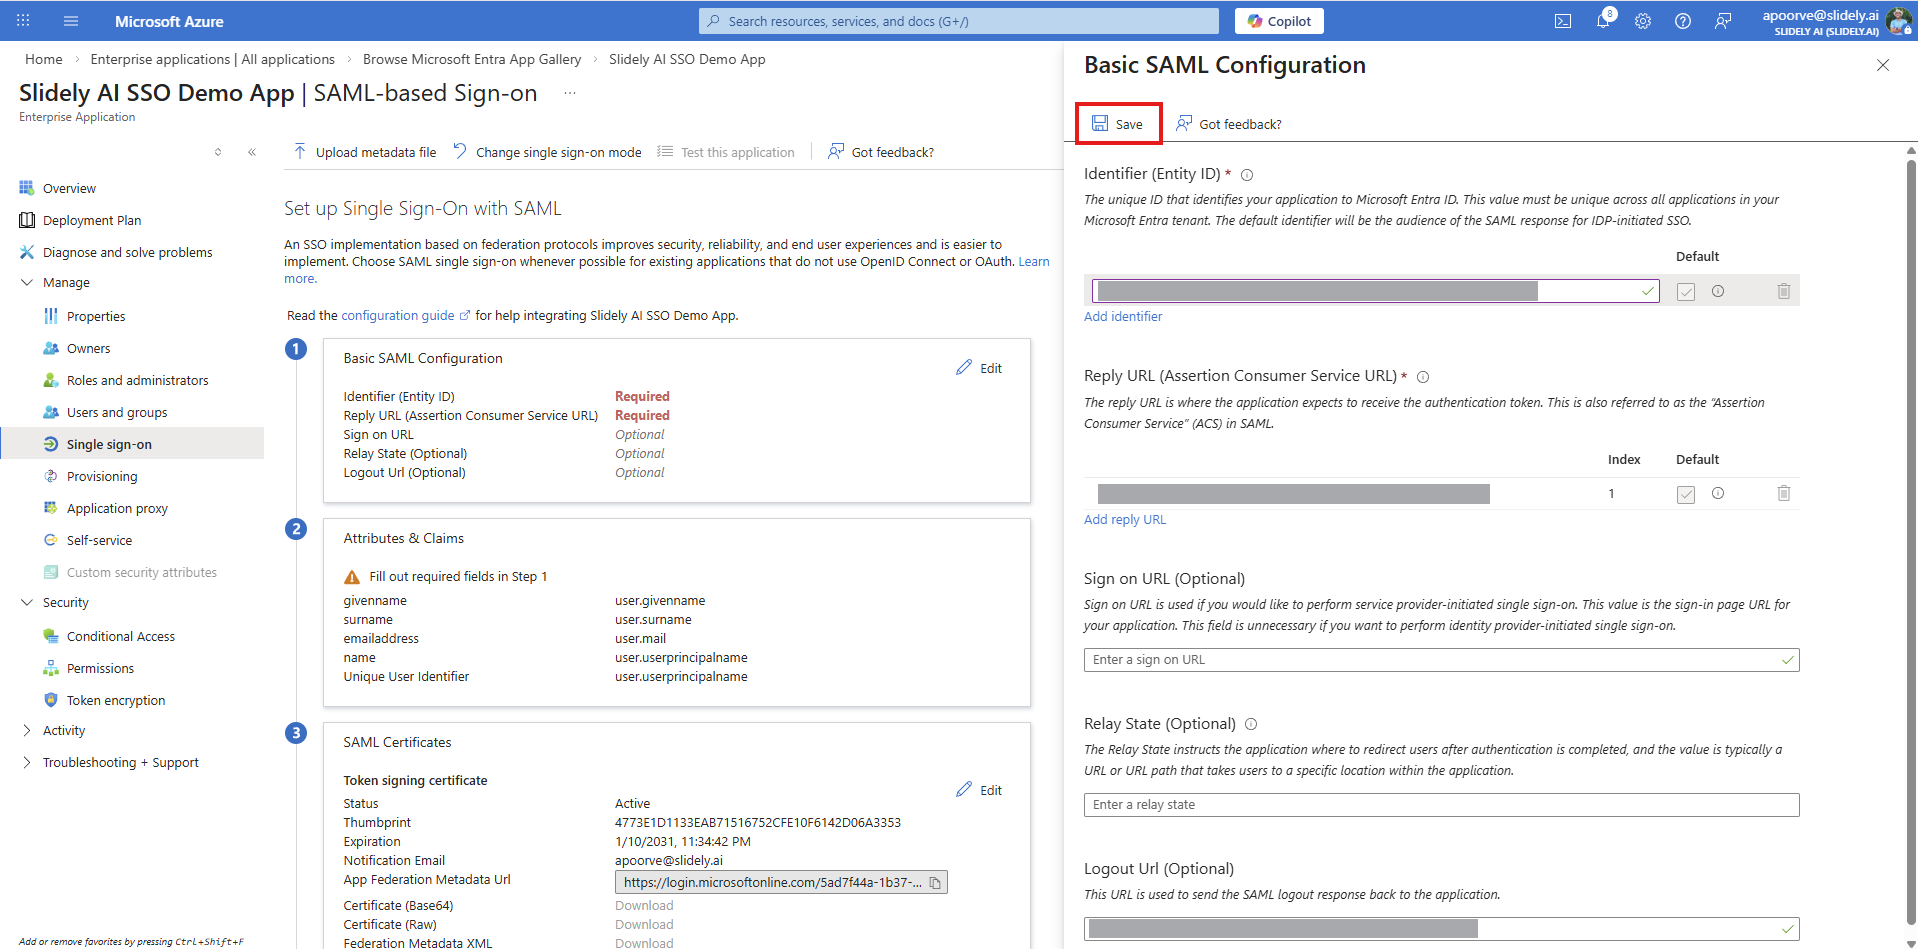
- Click Save on the SAML configuration popup.
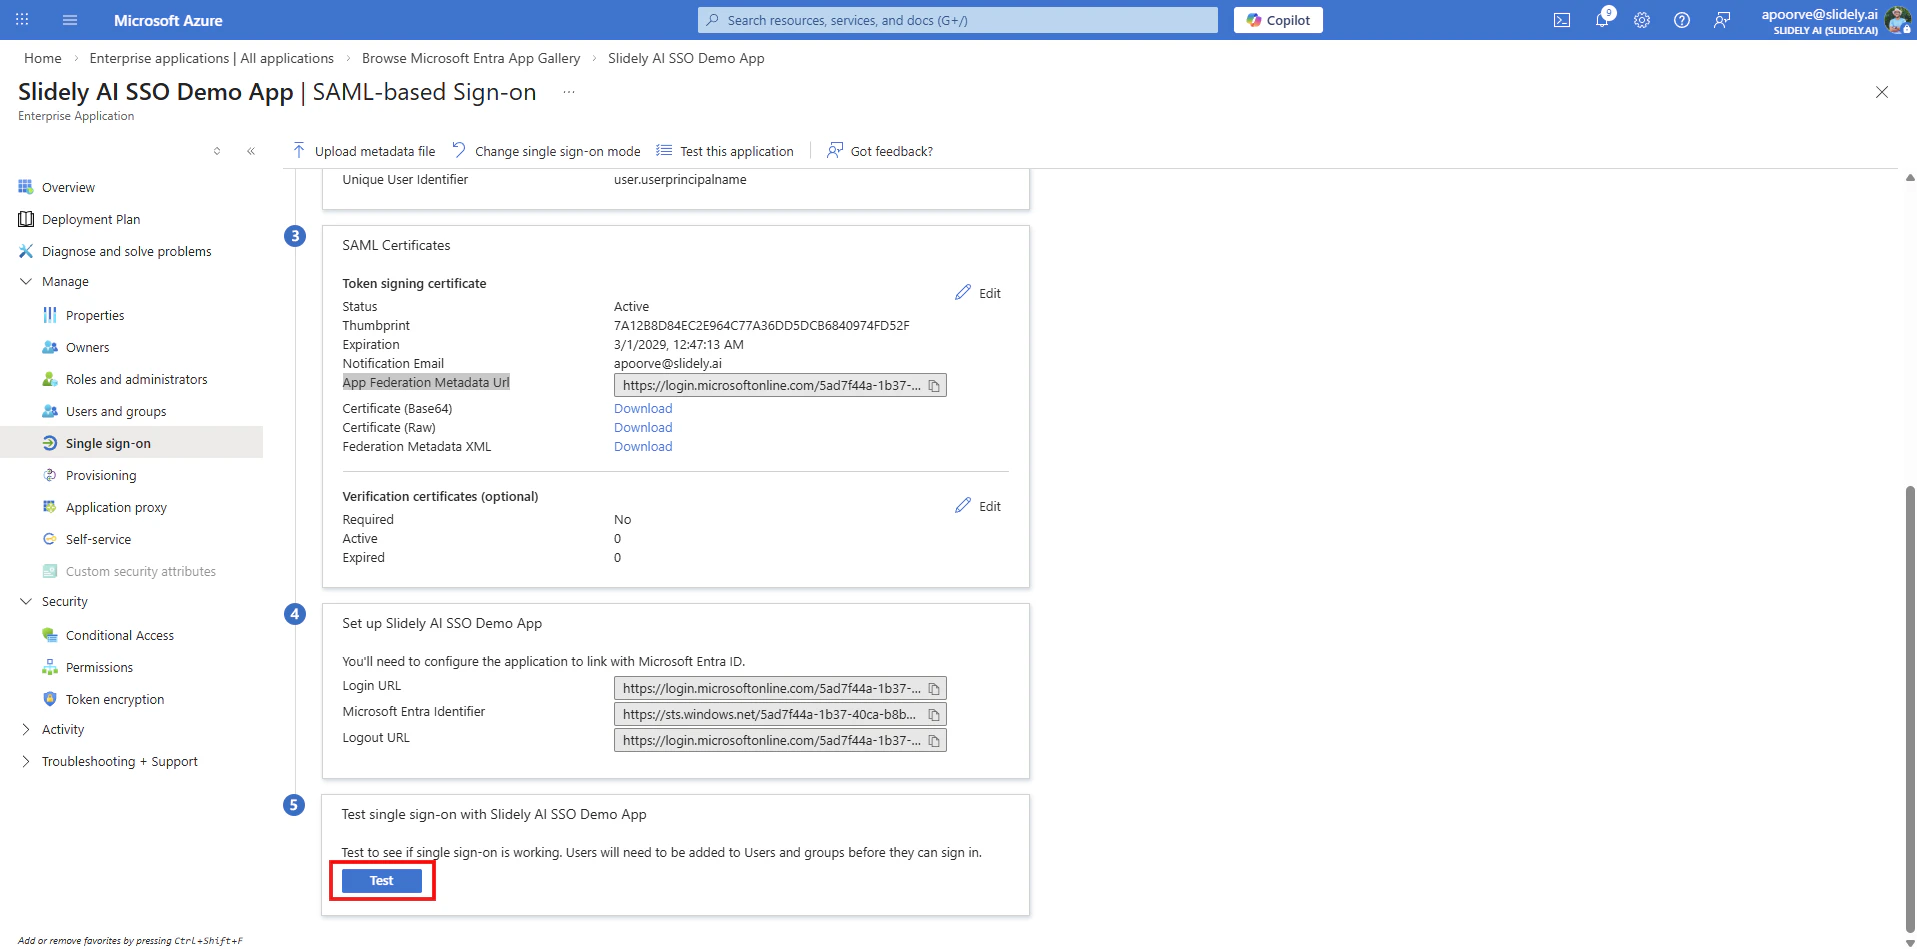
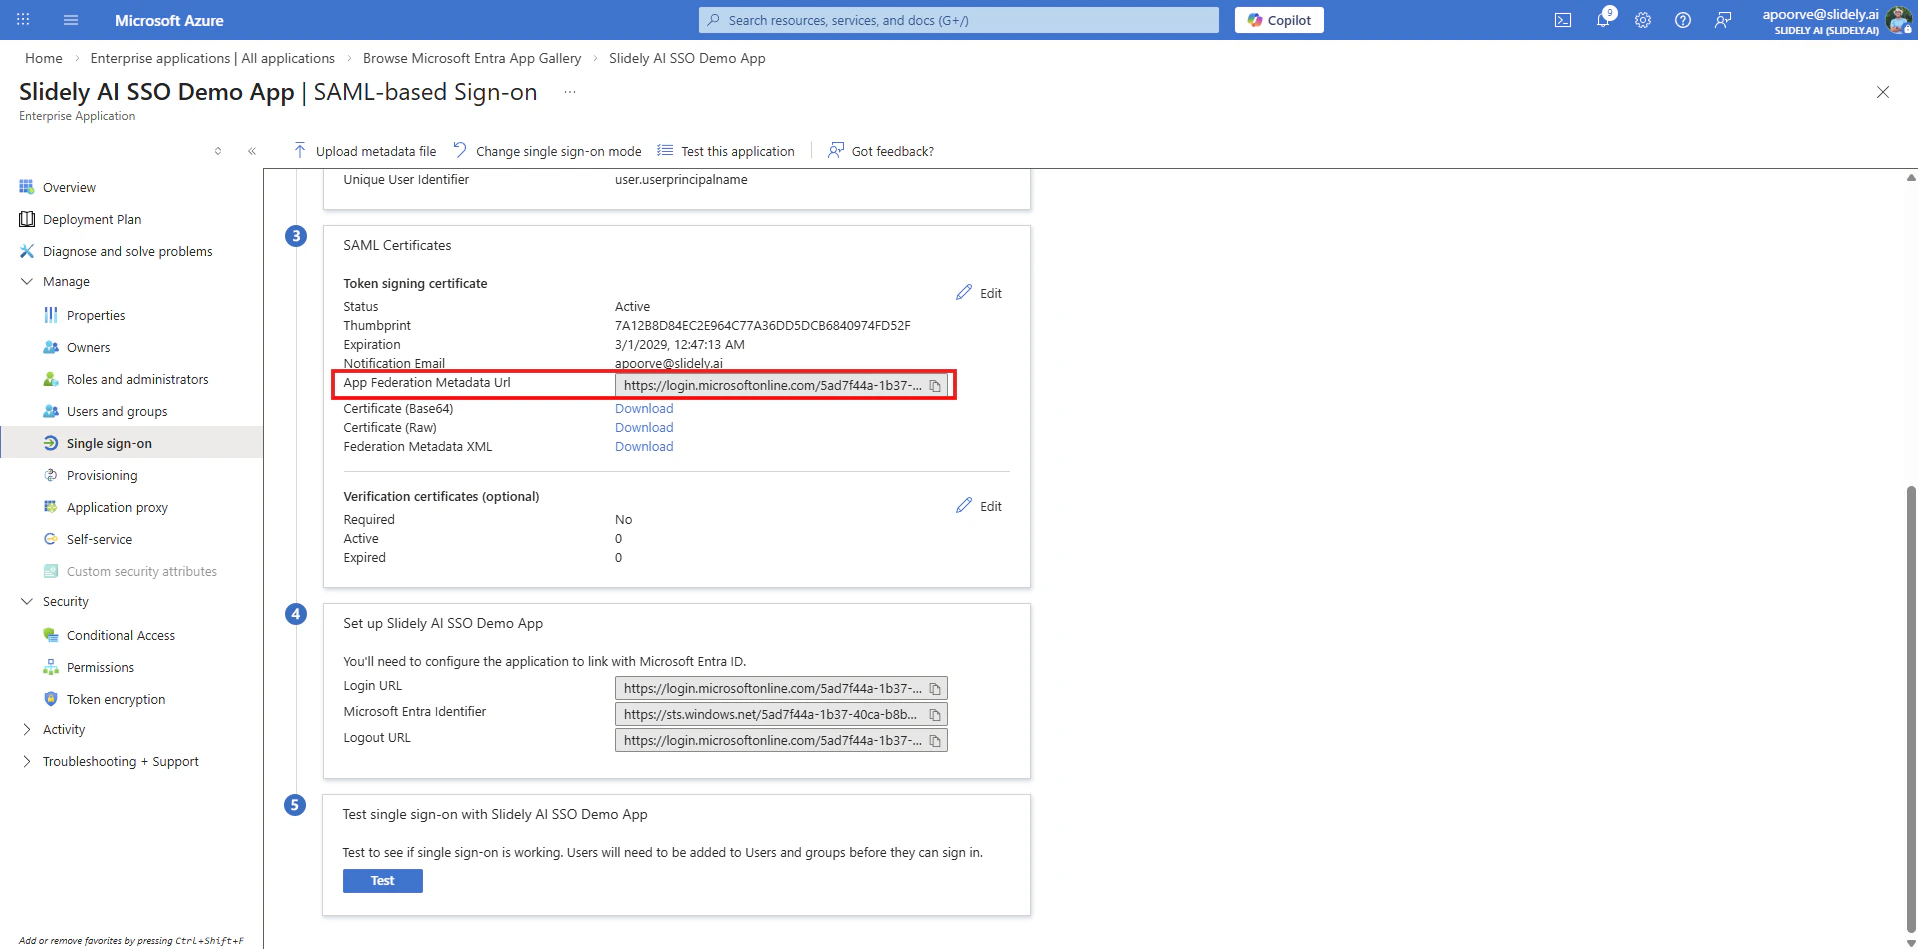
- Share the App Federation Metadata Url with the Slidely AI team.
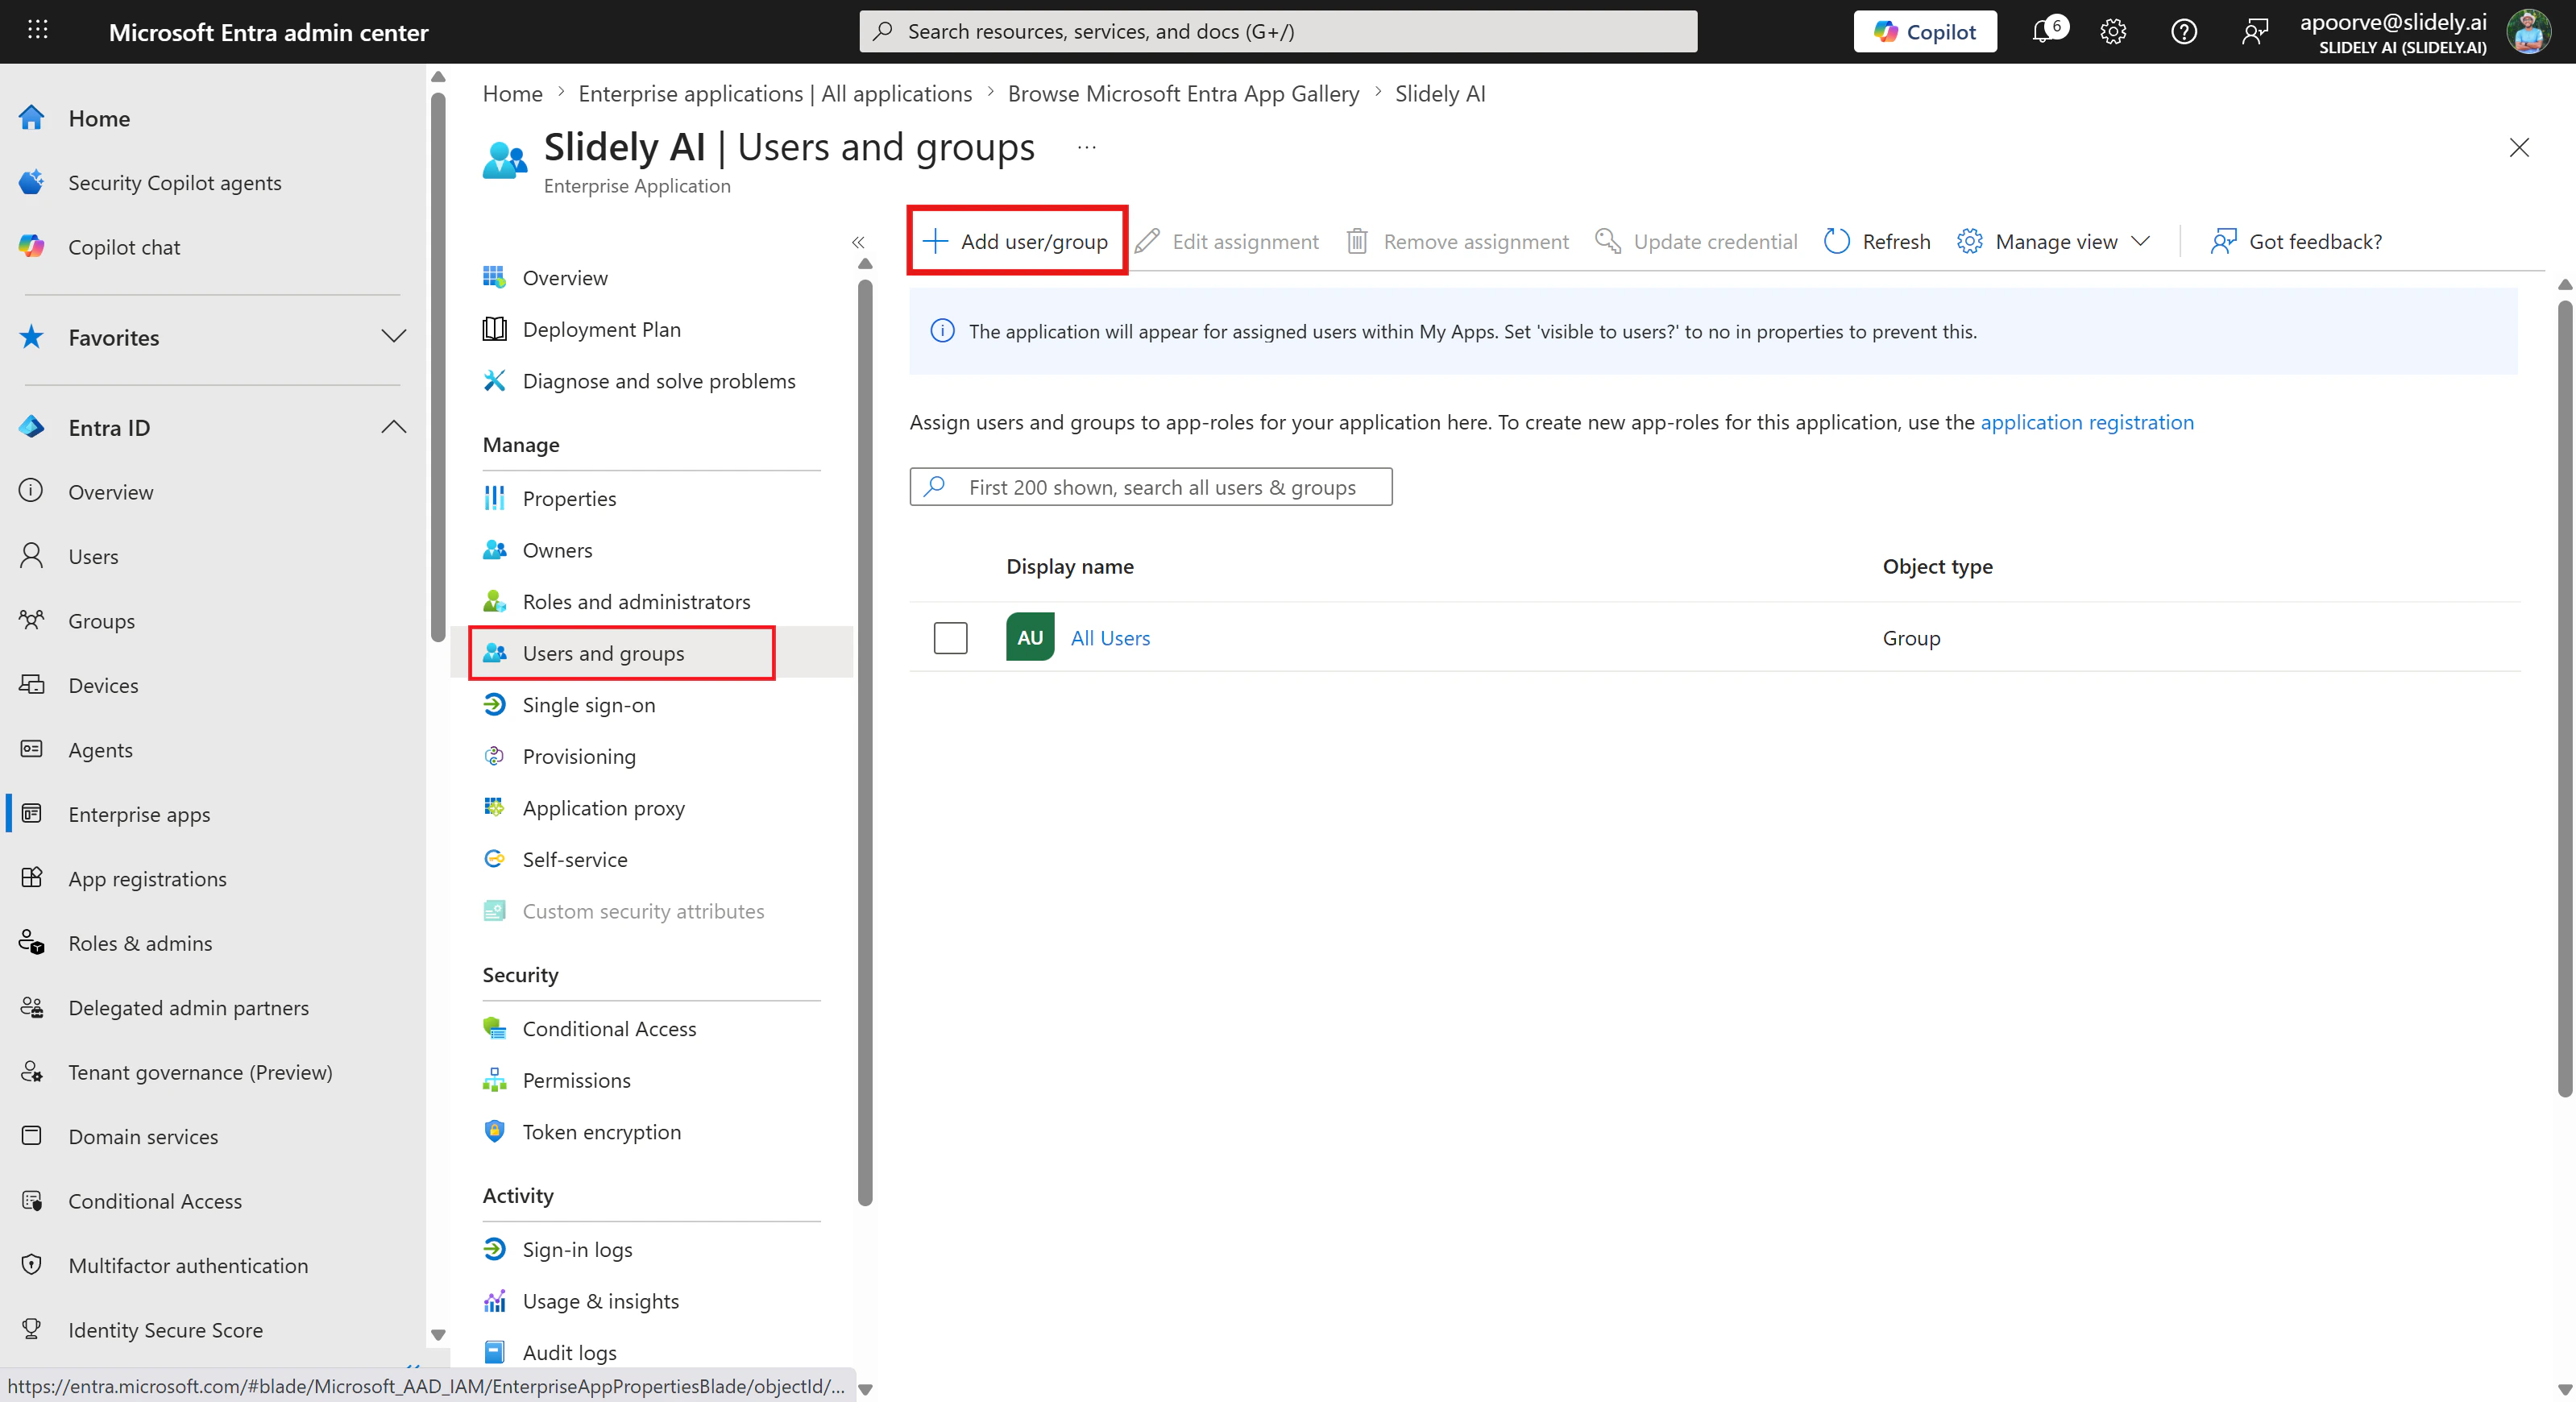
- Now that the SSO is configured, users and groups have to be assigned to the app to enable access. Click Users and groups, then click on Add user/group.
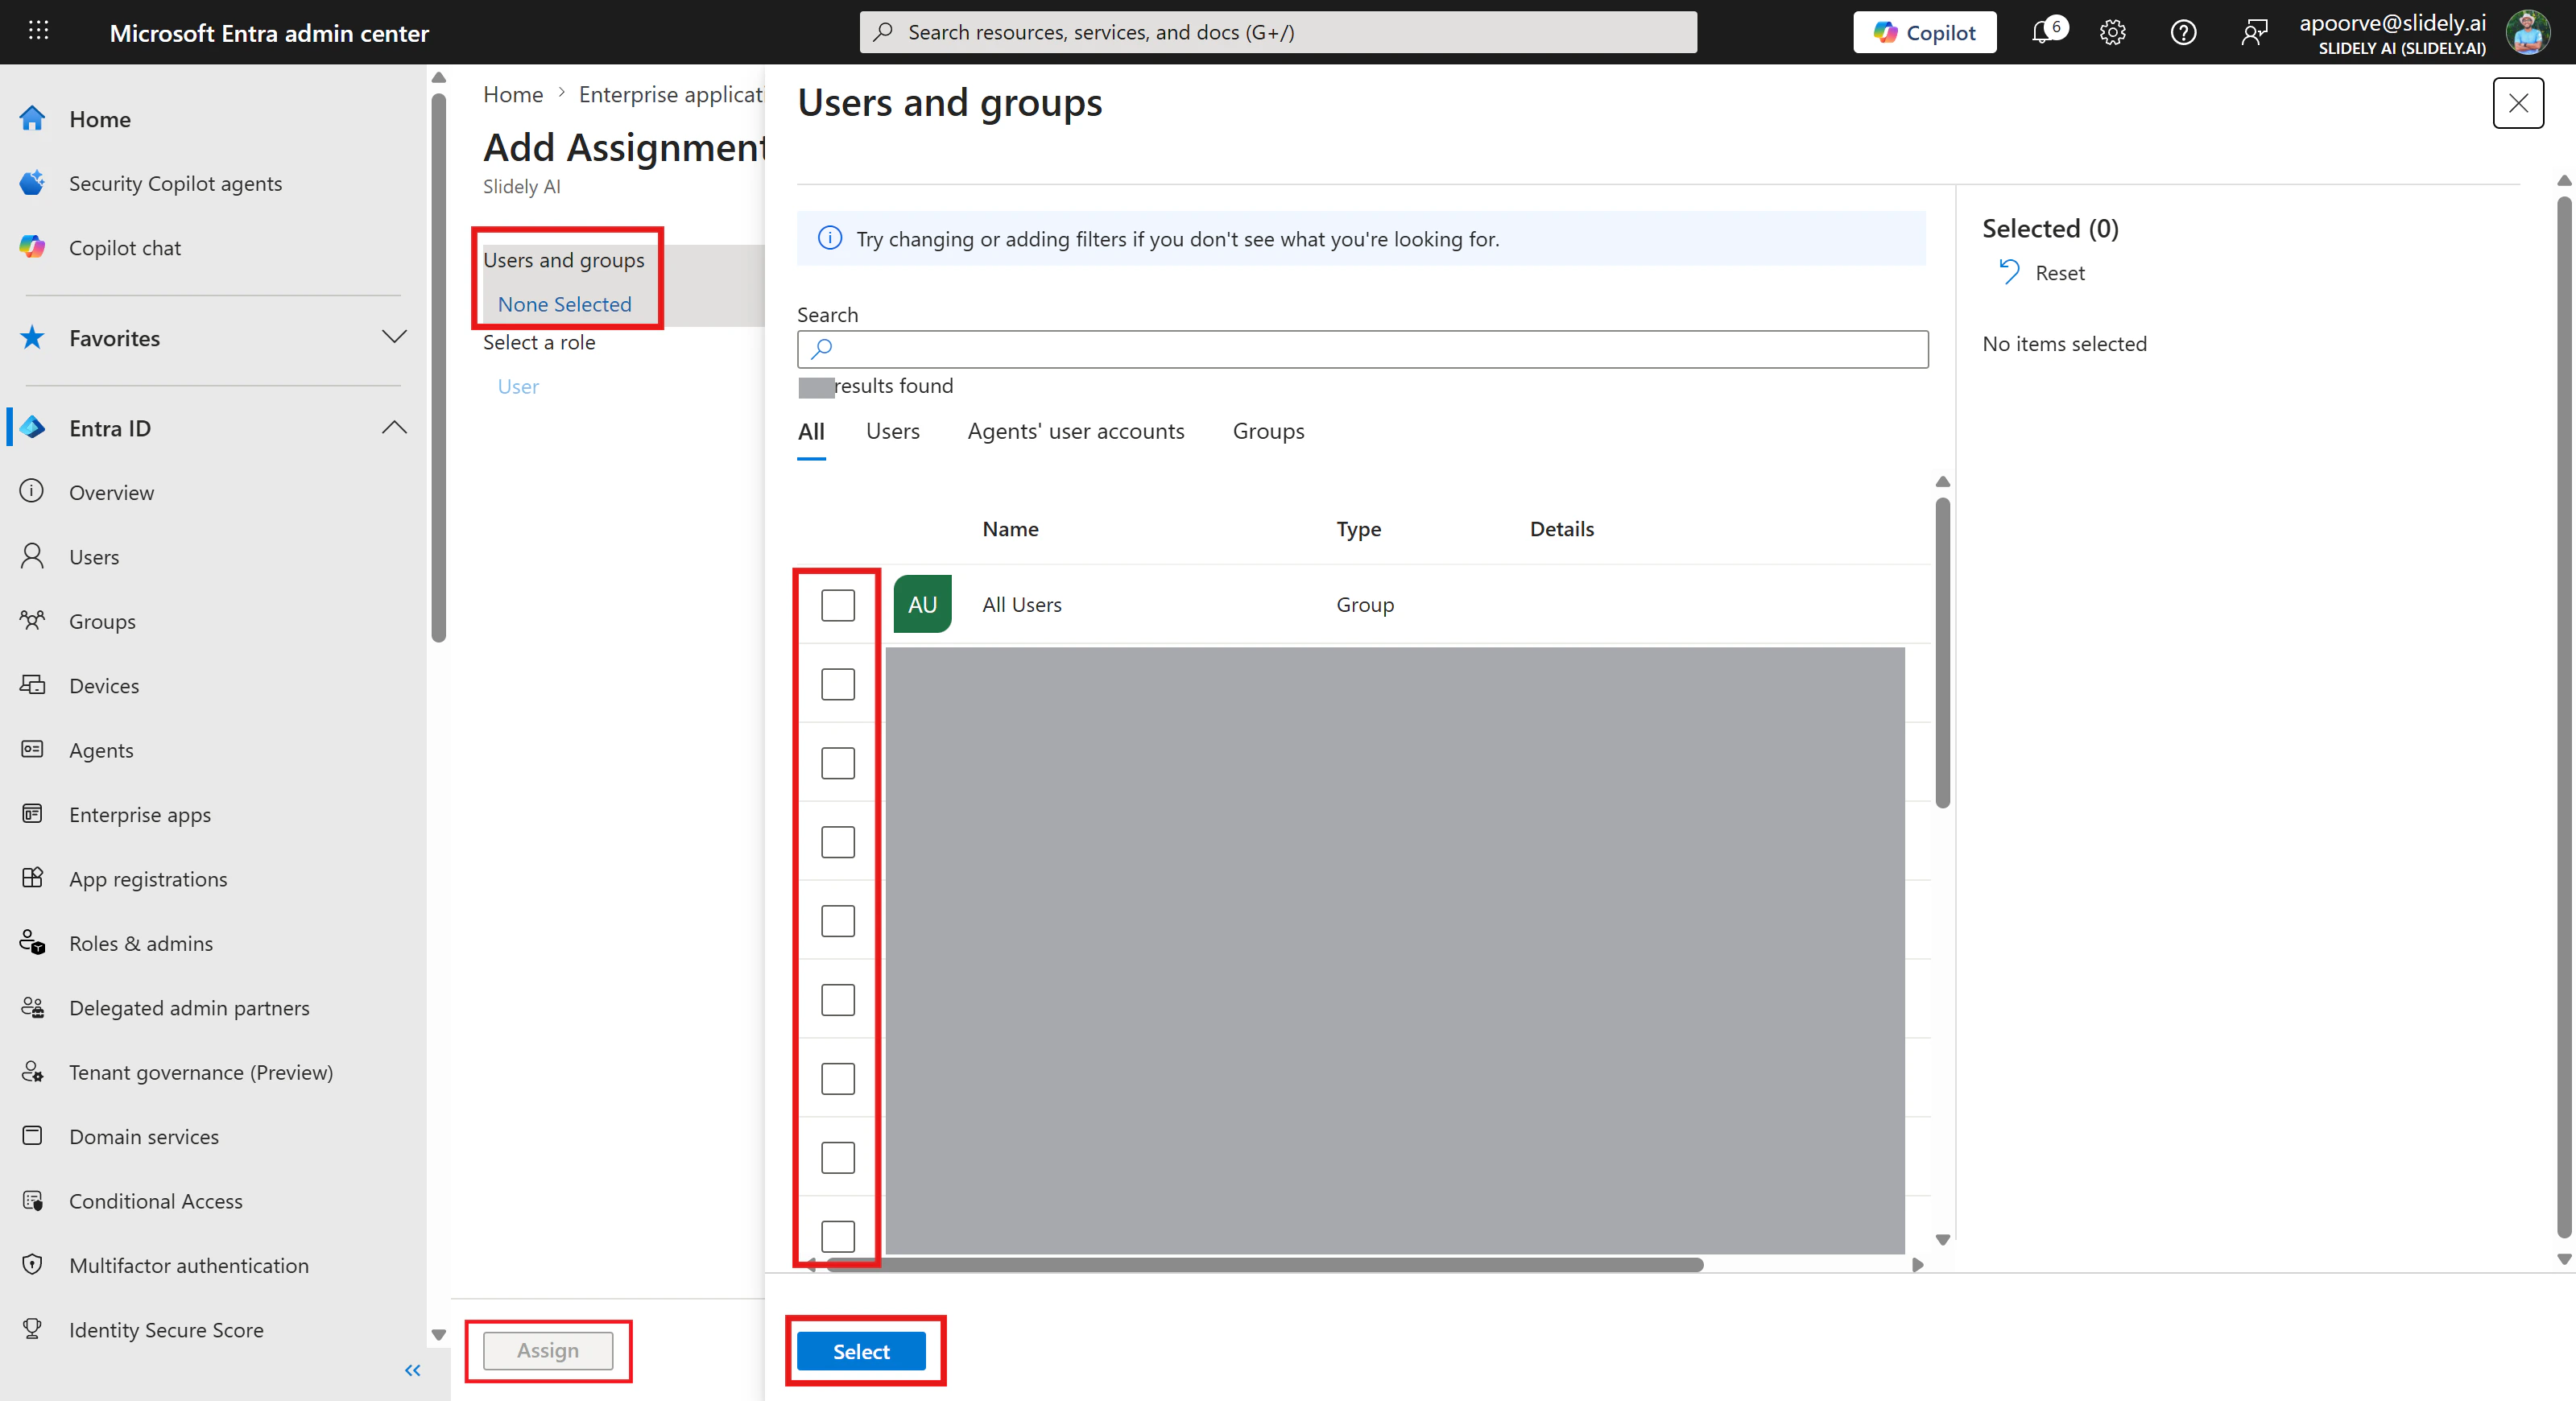
- Click None Selected, then select the required users or groups. To enable access for all users, select All Users, then click Select. The popup will close, then click Assign to save your settings.
- Once the SSO is configured from Slidely AI’s end, open the page again and click Test.